Please note that this procedure is done at your own risk unless explicitly directed by us.
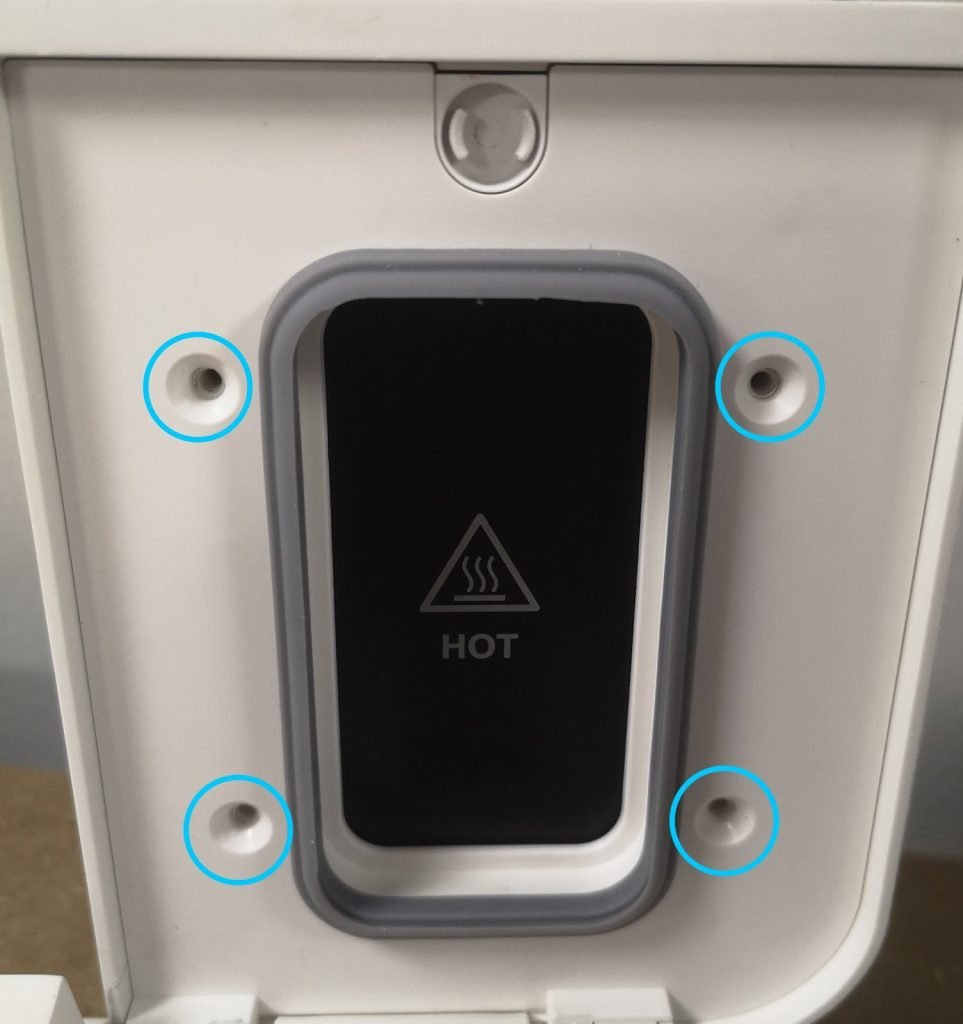
Step 1: Remove the PCR lid cover
Remove the four large screws on the inside of the PCR lid.
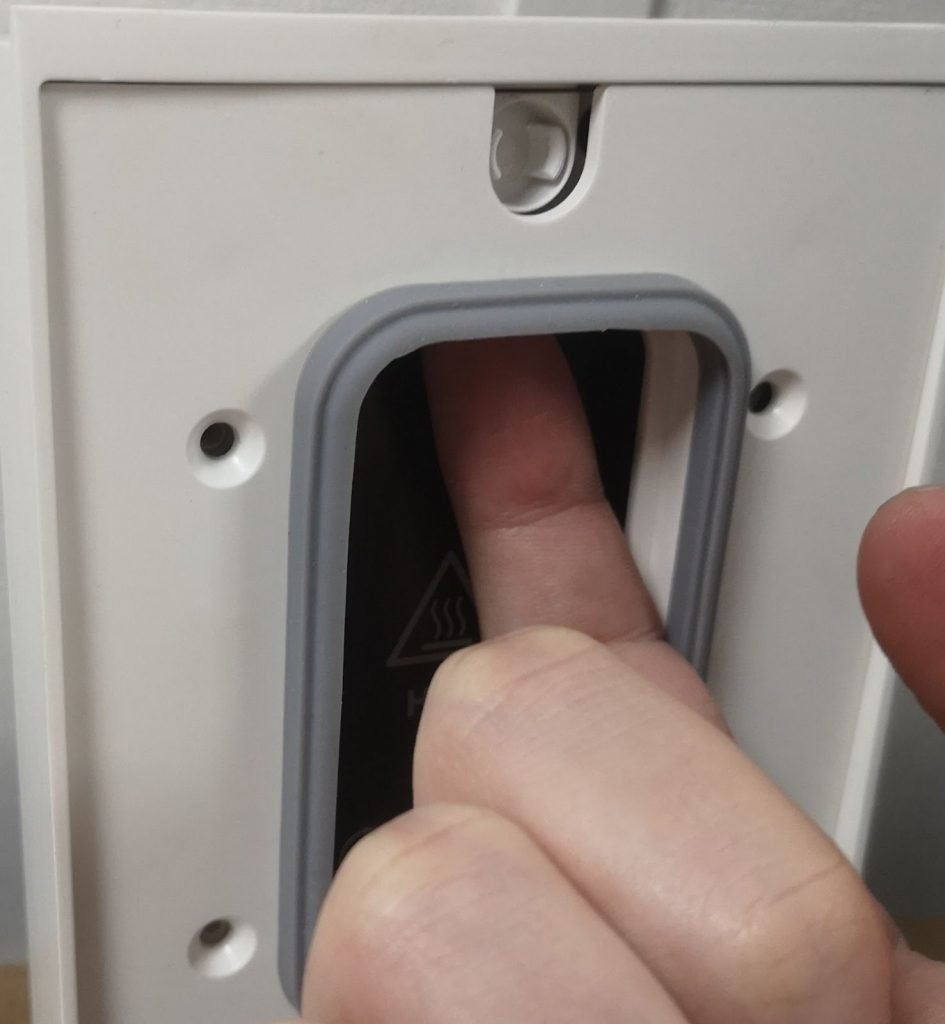
Then gently lift off the lid cover.
(Note that the rubber seal may come off during this step. If so, it can be easily pushed back onto the lid cover. The seal is held in place by mechanical friction.)
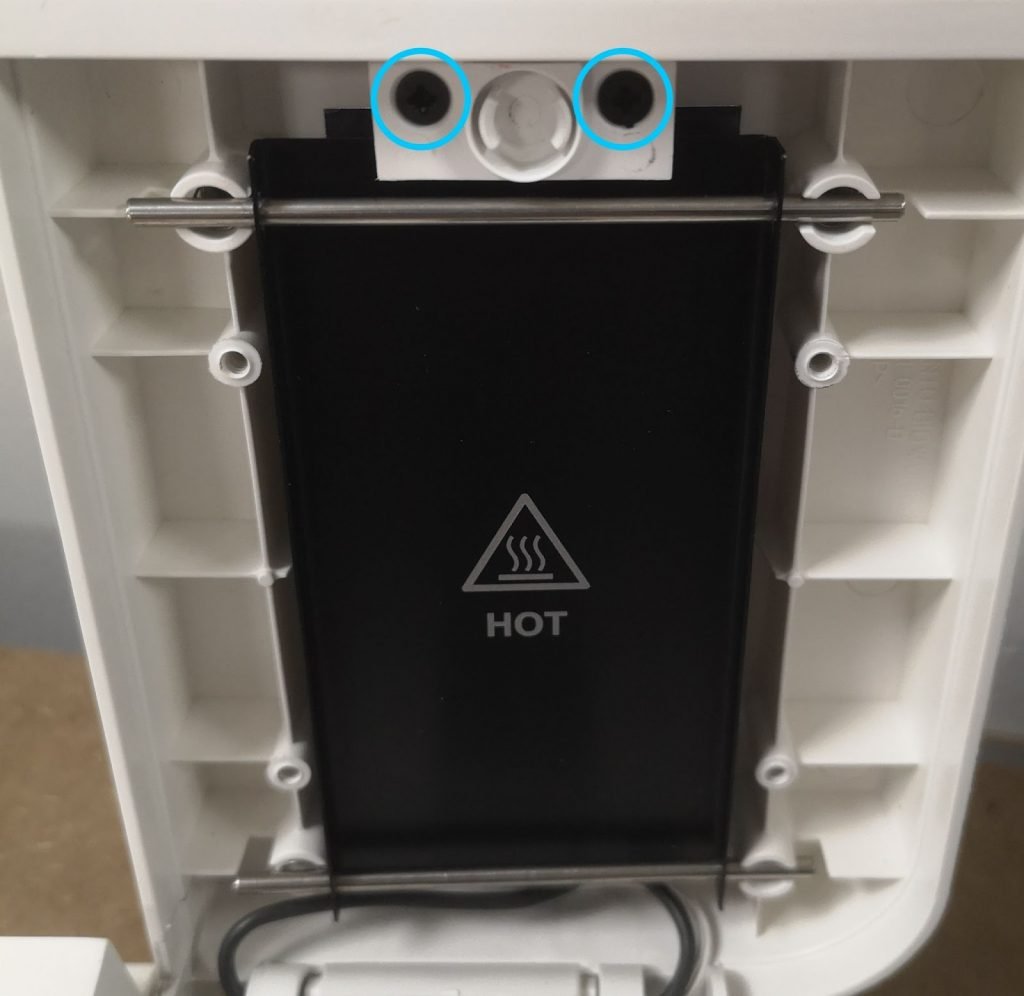
Step 2: Remove the Latch
Note: Depending on your Bento Lab version, the lid latch may be either of a black or a white color.
Remove the two small screws to remove the latch part.
Note, this may cause the heated lid to fall out as it is partly held in place by the latch.
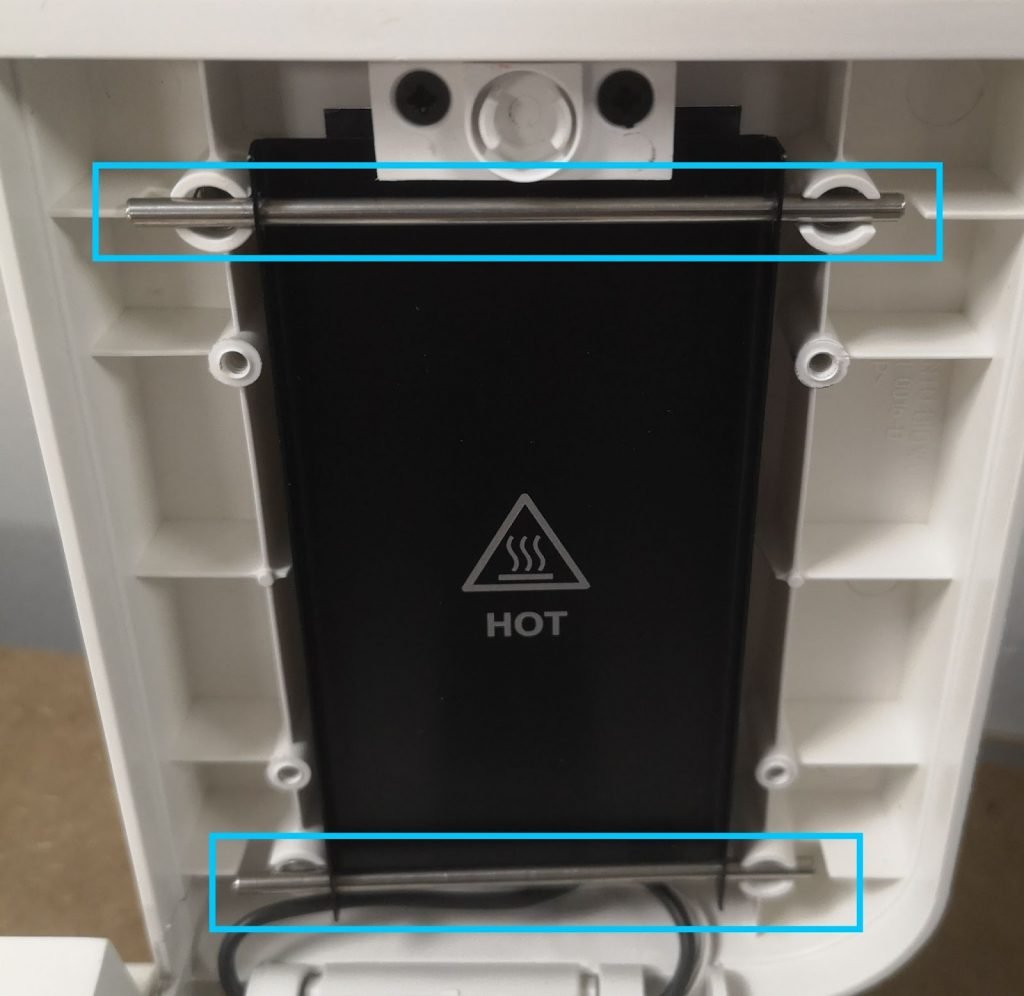
Step 3: Replace the latch
If the heated lid has moved out, put it back in position, with the two metal axles placed on the springs. Note that the lid may move a little bit – that’s ok and can be adjusted after the latch has been put back.
Secure the lid with the replacement latch using the two small screws. (Note that in the picture, the plastic latch is white for contrast. Instead, the actual replacement latch will have a dark gray or black color with a rougher finish.)
The latch will only fit in one orientation: with the rounded edge facing down.
Step 4: Close the lid
Ensure that the metal axles of the heated lid are in the right position and that the lid moves on the springs as expected. Then put the lid cover back on and secure it with the four large screws.
Test that the lid moves as expected after the lid cover has been put back.