Some of our users have asked us “Can we use Bento Lab for fieldwork without a microwave for making agarose gels?”
The answer is yes — there are a few different approaches that can be used, and so there is no need for your Bento Lab use to be limited by microwave oven availability!
Below we describe four approaches that can be used with Bento Lab in situations where using a microwave isn’t possible or ideal, such as during fieldwork or with improvised laboratories. Each approach has its own advantages and disadvantages, and these should be considered when deciding on the best approach for your own particular circumstances.
Approach 1: Use a small heating device such as a rice cooker to melt agarose
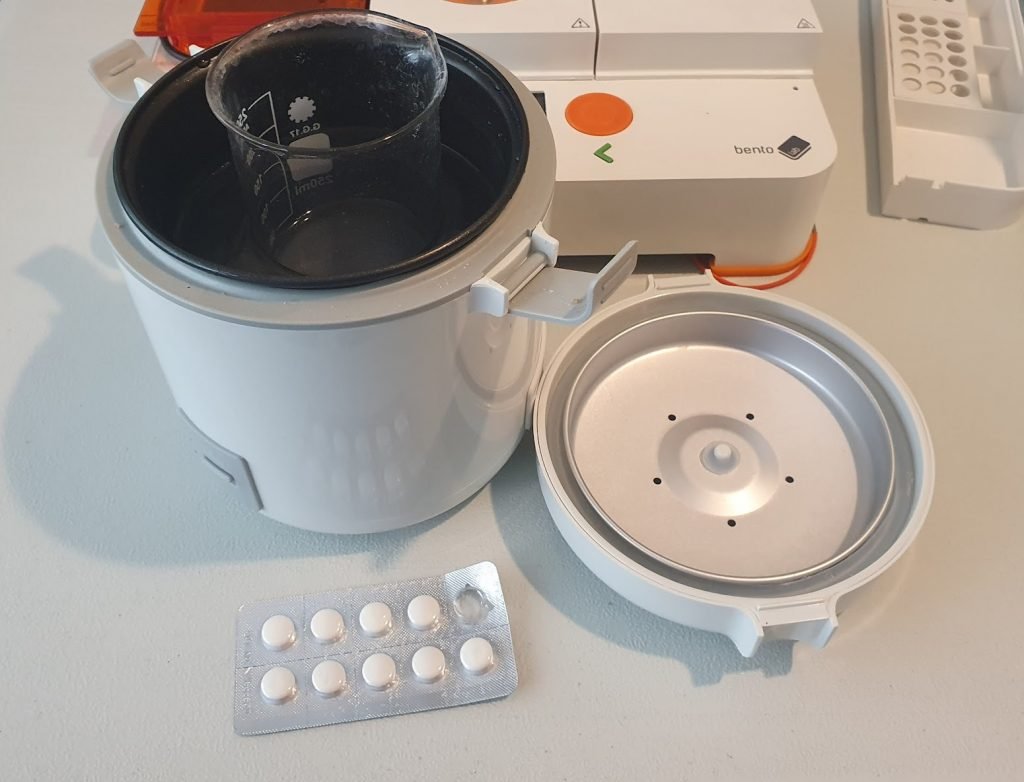
A rice cooker is a good portable alternative for a microwave!
We recommend using a small cheap rice cooker to heat agarose during fieldwork, in improvised laboratory settings, or even in a home laboratory.
At around 1 kg in weight and around 17 cm high and 14 cm diameter (the dimensions of the model we tested), small rice cookers can be big enough to boil a 500 mL beaker but are small enough to put in your backpack. Rice cookers are self-enclosed, designed to be safe when left mostly unattended, and can melt agarose in a shallow water bath — this means there is no risk of boiling over or burning. And they are fairly cheap, which means that buying one for just a few events a year isn’t a big financial burden.
Looking for advice on using Bento Lab?
Book a free consultation or ask a question.When testing this approach we found a £25 rice cooker melted 0.5 mL of agarose in 50 mL of running buffer completely in under 10 minutes. We checked for potential traces of partially melted agarose powder (which could make the gel hazy) and continued heating until the agarose was fully molten and completely clear. When molten, the beaker was somewhat cooler than a microwaved beaker of agarose, allowing it to reach pouring temperature more quickly. Gels set and ran entirely normally.
While heating, evaporation could result in some loss of volume from your molten gel, potentially impacting gel quality by causing the gel to have a slightly higher ionic concentration compared to the running buffer, and thereby increased heating and band distortion when run. For a 35-50 mL minigel, adding one or two mL of distilled water may be a good idea to compensate for evaporation during heating. Evaporation loss can be experimentally determined by checking the volume of agarose and water pre-melting and post-melting.
Other heating devices such as pressure cookers, kitchen hobs, or travel kettles with flat internal elements, could could produce similar results when used as improvised heating equipment, especially if you use them to simmer a beaker in a pan of water to control heating. Any of these approaches are far more portable than even the smallest microwave oven!
Advantages: low cost; portable; small footprint; reliable; adaptable approach
Disadvantages: melting takes longer than a microwave; requires a power source; evaporation losses over long heating periods should be assessed
Approach 2: Use a camping stove to melt agarose
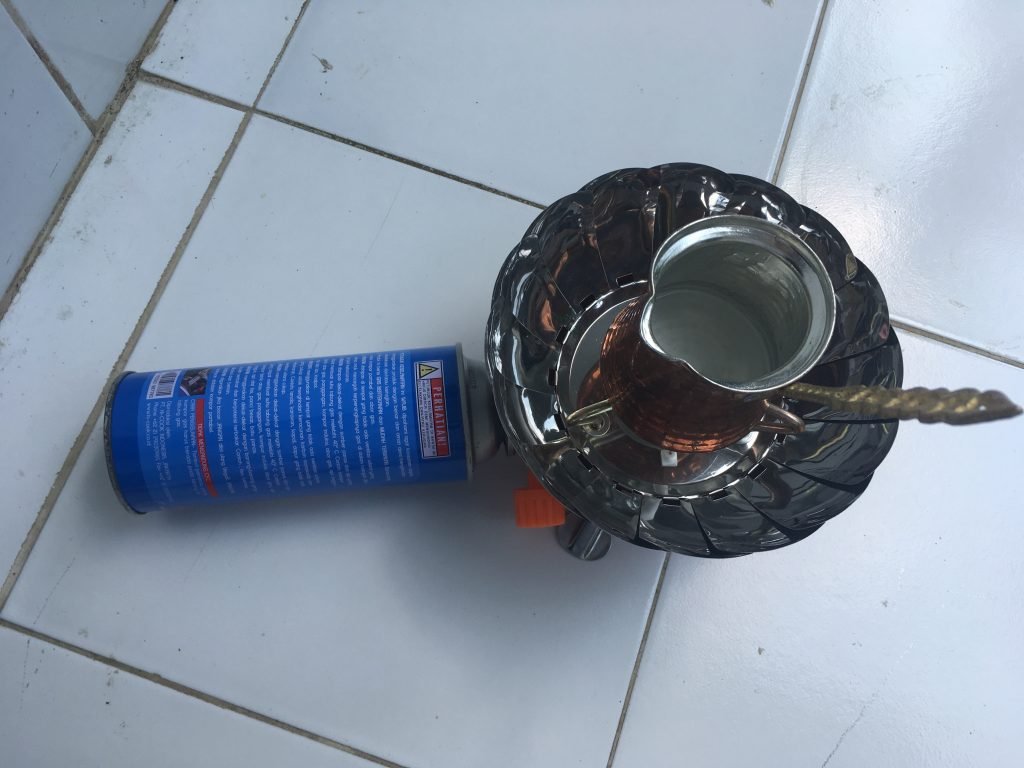
Melting agarose on a camping stove in a traditional Turkish coffee pot.
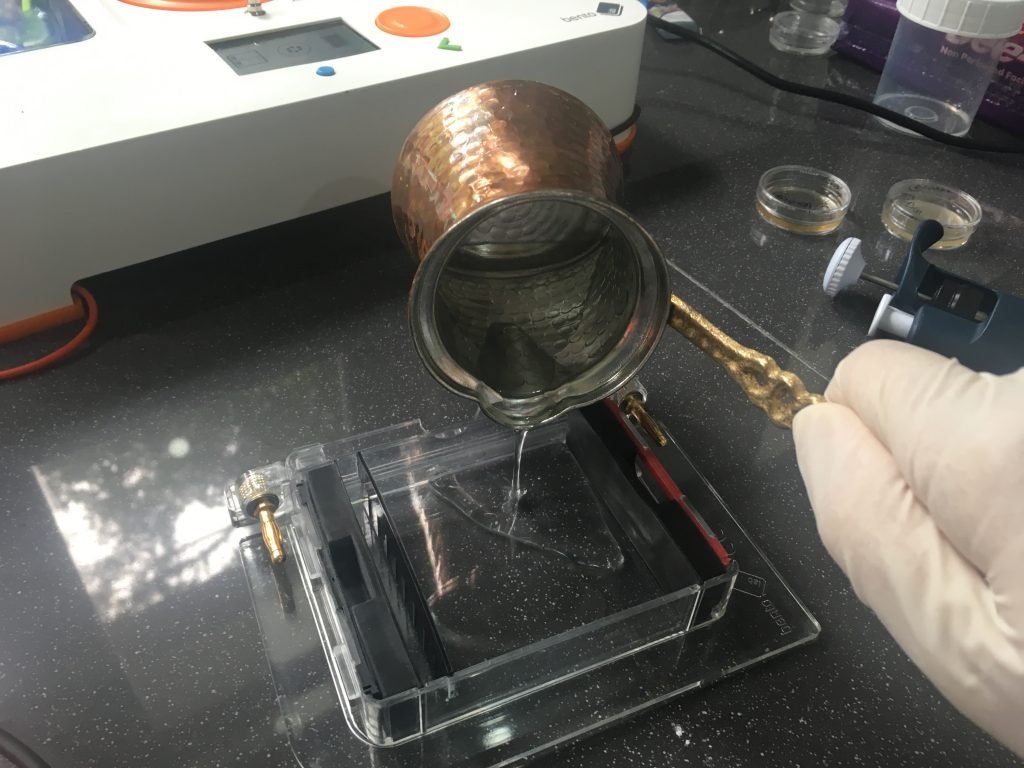
Pouring agarose from a traditional Turkish coffee pot.
Keep your equipment ultra-minimal and cut down on electricity use by using a camping stove and a container with a handle, to melt and pour agarose gels.
This approach was suggested from Dr. Ineke Knot, a research scientist with expertise in field sequencing of nematodes of great apes using Oxford Nanopore MinION and Bento Lab (you can read about her research with Bento Lab here).
Ineke suggests using a traditional Turkish coffee pot or cezve to melt and pour agarose because of its long and very convenient handle. A metal camping cup could also be used, but pouring the gel may be more difficult with shorter cup handles.
When using this approach there are a few health and safety implications that you should be aware of when risk-assessing your workflow:
- Any container used to melt agarose should never be used for food or drink – so label it clearly!
- The camping stove frame will be a fire hazard, and should only be used in an appropriate place where there is no risk of fire to the surroundings, whether indoors or outdoors.
- The agarose and container will get very hot very quickly, and the agarose may become super-heated, so the melting process should be carefully monitored.
- The agarose could become super-heated and could cause burns if it is spilled or knocked over onto the user or people nearby. Be careful that the stove and coffee pot are stable, that it is left to cool a little before removing it, and that there are no people nearby who could accidentally get burned.
Advantages: Ultra-portable, rapid, and electricity-free, provided you have a camping stove available.
Disadvantages: Using an open flame to melt agarose may not be suitable for some settings.
Approach 3: Pre-cast your own gels for use in the next one or two weeks
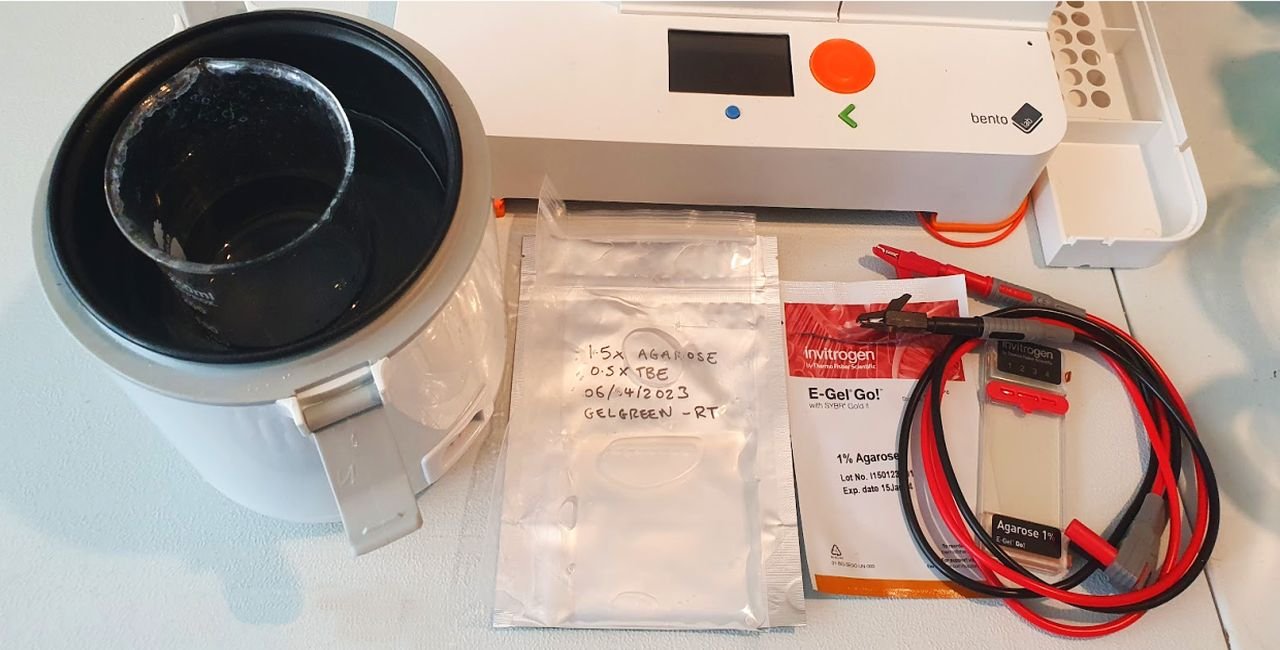
Pre-cast your own gels and store them to run later!
Pre-casting your own gels means that you can have the gels you need ready to use when you want them. Gels do have to be cast in advance, so you do need a microwave or alternative heat source when doing this, plus time to prepare them. But this could be worth it if you plan on doing time-critical fieldwork, workshops, demonstrations, or just want the flexibility to set up and run Bento Lab anywhere with minimal added cost.
Hand-cast agarose gels can have a shelf life ranging from a week to several weeks if stored appropriately, even when kept at ambient temperatures. They should be stored so they are protected from light and can’t dry out. This approach also has the benefit of costing nothing more than a normal agarose gel other than a few items of packaging.
Interested in DNA methods and workflows? Subscribe for monthly insights.
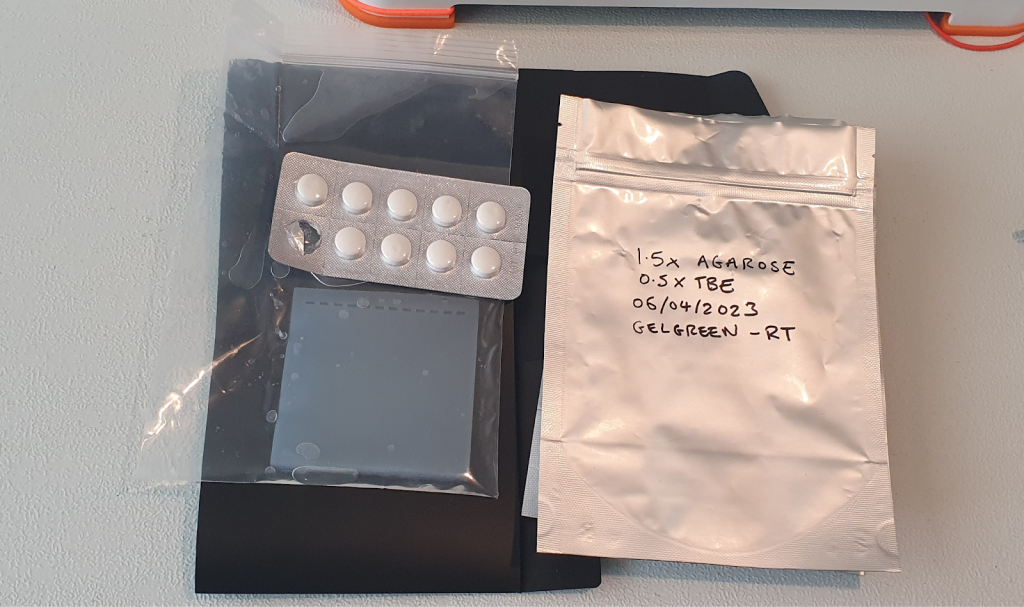
We have had good results storing pre-cast agarose gels at room temperature with GelGreen® DNA stain in large (13 x 19 cm) plastic press-to-seal bags inside aluminium foil pouches (13 x 18 cm), with a small amount of running buffer. Use of large plastic bags avoids gel damage when transferring the gel in and out of the bag. Our test gels functioned well for up to two to four weeks (and might last longer!), and their packaging provided protection from drying, light and some physical damage when handling. Additional protection could be provided by transporting in a cardboard or plastic box during transport.

An agarose gel run after two weeks storage at room temperature
Storage of gels in the fridge before use is likely to increase shelf-life, but some DNA stains such as GelGreen can precipitate at low temperatures and are best stored at room temperature. Alternative DNA stains should therefore be used if fridge storage is desired. Agarose gels shouldn’t ever be frozen because ice crystals will ruin the gel.
When using pre-cast gels, carefully slide them out of their packaging facing upwards directly into the gel electrophoresis tray, making sure to align the top of the gel with the top of the tank (black electrode). The gel can then be covered with running buffer, loaded with PCR products and DNA ladder, and run as normal. If you use a variety of running buffer solutions then it is important to label the pouches with the gel details, and always use the same running buffer as you used to cast the gel.
If you plan on using pre-cast gels, we suggest testing them under similar conditions to those you will be encountering during planned experimental and field work, since conditions such as storage temperature may differ from those we used when testing. We would also suggest considering back up options to ensure that unexpected issues with your gels do not impact your workflows.
Advantages: low cost; time-saving during experimental or demonstration work; no power source required
Disadvantages: microwave ovens or other heating approaches are needed to initially cast the gels; gels can be fragile when handled (especially low density gels); gels are at risk of degrading or developing microbial contamination over time
Approach 4: Use E-Gels
Add e-gel functionality to your Bento Lab with some crocodile clips
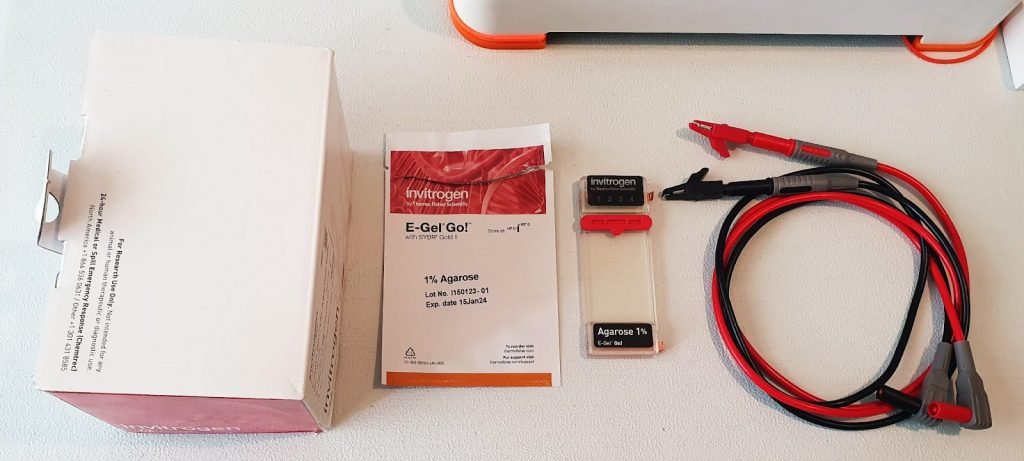
E-gels are an extremely convenient alternative to hand-casting agarose gels. They consist of a small ready-made gel encased in a plastic case with built-in electrodes, and have a very long shelf-life. However, they are quite expensive per E-Gel, ranging at between £6 and £20 per gel depending on the brand, supplier, and number of wells each gel has.
This approach could be for you if you want a very reliable and portable solution for agarose electrophoresis without the hassle of making your own gels, for example during important fieldwork or teaching/workshop activities.
E-gels can be used with Bento Lab by connecting the E-gel electrodes to the Bento Lab power supply using banana plug test leads and crocodile clips, and running at the recommended voltage and time for that E-Gel. This should take between 30 min to 45 mins for a complete run.
When using this approach you should fully risk assess the use of potentially live electrical leads. To reduce risks Bento Lab has a built-in circuit shutdown when electrodes are not connected. In addition, careful handling and the use of insulated leads and clips should remove the risk of coming into touch with live current. Even so, great care should be taken to remove the possibility of anyone touching the ends of the clips and getting an electric shock.
We tested Invitrogen E-Gel Go! with Bento Lab, connecting them with commercially available test leads and crocodile clips. We found that they connected well if the electrode contacts were unfolded from the case (you can pick them loose with a fingernail), and then folded back halfway to double thickness, to produce a small tab to which we could connect the crocodile clips. This tab was fragile and so care should be taken not to unduly stress and snap it.

Connecting crocodile clips to e-gel electrodes
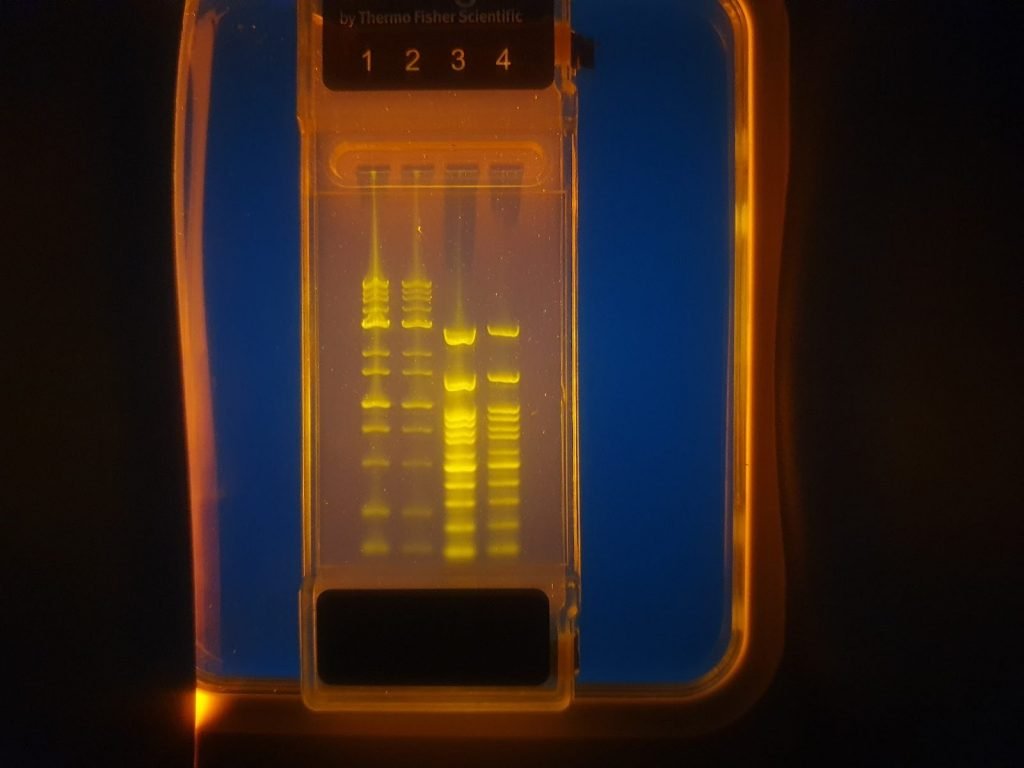
The E-Gel Go! required 10 uL volume per well sample to run properly, and the DNA stain was extremely bright. We found that 1 uL of DNA ladder or PCR product diluted with 9 uL of distilled water achieved a good gel result. Loading the E-Gel required placing the pipette tip directly into the target well without damaging the gel. The E-Gel took 45 minutes at 70 V to reach the bottom of the gel, although good separation was seen for the 100 bp ladder at 30 minutes.
The E-gel is very easy to visualise using Bento Lab’s blue light transilluminator by simply placing it on the transilluminator, placing a gel imaging hood over the top of it, illuminating it, and photographing with a smartphone camera.
Visualise E-Gels using Bento Lab’s blue light transilluminator
Invitrogen E-Gel Go! ™ run for 45 minutes at 70 V with Bento lab. Lane 1: 2 µL of 1 kbp ladder in 8 uL distilled water; lane 2: 1 µL kbp in 9 µL distilled water; lane 3: 2 µL of 100 bp ladder in 8 µL of distilled water; lane 4: 1 µL of 100 bp ladder in 9 µL of distilled water.
The main disadvantages of E-gels are cost and capacity. An E-gel can cost between £10 and £20 for between 4 and 22 lanes (including delivery and taxes), but this price could certainly be justified by applications or events where portability and reliability is at a premium.
Advantages: easy to use, reliable, long shelf-life, very portable, can be used with Bento Lab with cables and without separate power and visualisation devices
Disadvantages: expensive per E-Gel and per sample
In conclusion…
Here we tested different approaches to gel electrophoresis with Bento Lab for when microwave ovens are not available or desirable for making electrophoresis gels: melting agarose with a rice cooker, pre-casting gels, and using E-Gels.
All approaches worked well during our tests, and we can easily see them all having a place during fieldwork or in improvised lab settings.
Of course, there is no substitute for experience in the field, and we have an additional of using a camping stove and a long-handled traditional Turkish coffee pot for melting agarose from an experienced Bento Lab-using field researcher!
Combining approaches could also be extremely useful for many users who want both affordable and extremely reliable solutions:
- Rice cookers, or camping stove solutions, can give Bento Lab users the flexibility to cast what they need, when they need it
- Pre-cast gels can save time during time-critical experiments, and improve workflow portability
- E-Gels can provide a long shelf-life backup in case of failures, or be used where convenience and reliability outweighs cost
We hope these approaches will help make Bento Lab an even more portable and powerful DNA analysis platform for fieldwork, teaching, or improvised lab settings, especially where microwave ovens are not readily available or practical to use!
Please let us know what other resources, advice, and tips and tricks for using Bento Lab that you would like us to produce in the future!
Looking for advice on using Bento Lab?
Book a free consultation or ask a question.