DNA Extraction from Dried Blood Spots – HotSHOT Kit

Reagents

Consumables

Equipment

Abstract

This protocol describes how to extract a DNA sample from dried blood spots for bird sexing using a HotSHOT DNA Extraction Kit and Bento Lab.

Please note that this protocol has been tested for bird blood only, and it may not work for blood from other animals.

Sample Preparation

In this step you will prepare your samples for DNA extraction.

  1. Obtaining sample

    Collecting dried blood spots is a common method for obtaining and transporting DNA for bird sexing.

    Blood spots should be collected in a way that causes the least distress to the bird, for example by clipping a toenail close to the toe until it bleeds, pressing the tail to a piece of paper, and then stopping the blood flow with a coagulant or styptic substance. There are videos on YouTube that will show you how to do this.

    Please note that we are not experts in animal handling, and it is your responsibility to ensure that your birds are handled safely and responsibly to avoid harm.
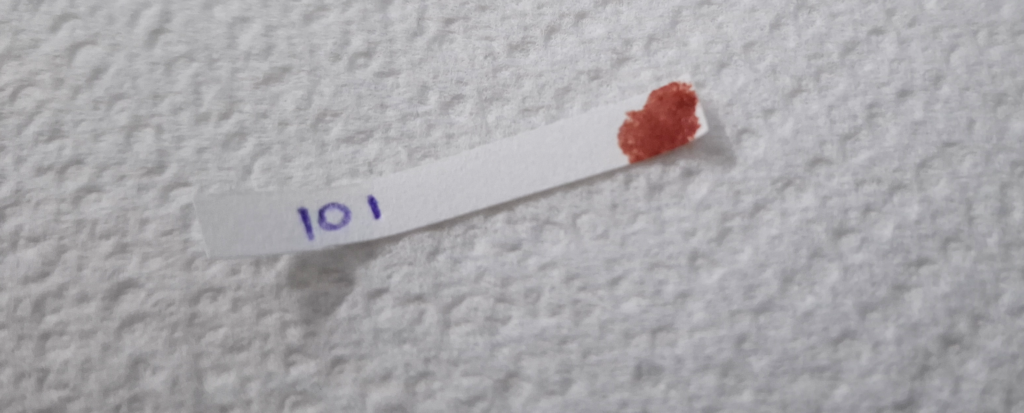
    A blood spot collected on a small strip of filter paper.

    Once collected, the blood spots are allowed to dry and stored at room temperature. For long-term storage, sealing blood spots in bags with silica gel can help keep them dry and preserve DNA quality.

    When you are ready to use the dried blood spots, sample an approximately 1-1.5 mm × 1–1.5 mm square using a clean scalpel or razor blade on a clean surface (e.g. a cutting mat/non-scratch surface), or a 1–1.5 mm diameter disk using a clean 1 mm or 1.5 mm paper hole punch or biopsy punch.

    Place the dried blood spot subsample in a PCR tube labelled on the top and side in permanent marker. One easy way to transfer the sample is to flick it into the tube with the tip of the scalpel or razor blade. You can also use tweezers if you prefer.
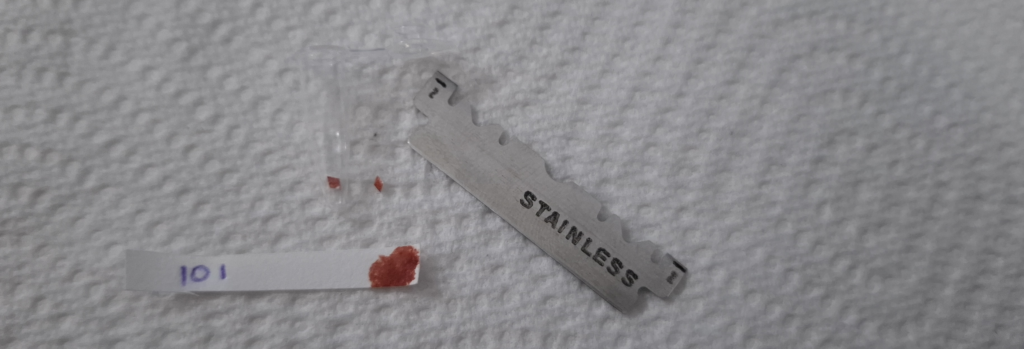
    A blood spot collected on the end of a strip of filter paper, with a small fragment sampled in a PCR tube.

    To avoid sample cross-contamination, clean/sterilise your scalpel/razor blade/hole punch and cutting surface between samples.

    Even if you only have one sample, it’s good practice to label the tube clearly with a unique identifier for the sample used. It’s also a good idea to mark on the tube the date and to keep a note somewhere of which samples were prepared, and when.

DNA Extraction

In this step you will extract DNA from the samples prepared above.

  1. Tissue lysis of sample

    Make sure the dried blood spot squares or disks are at the base of the tube before starting the DNA extraction; flick or tap the tube until the dried blood spot is at the bottom of the tube, and then keep the tube upright.

    Pipette 75 μL of Alkaline Lysis Solution (from the HotSHOT DNA Extraction Kit) into each labelled PCR tube containing a sample. To do this, set the 20-200 μl adjustable pipette to 75 μL and use the 2-200 μL pipette tips. You can either use a fresh pipette tip each time, or use the same pipette tip to carefully squirt the reagent into the tube without touching the sides of the tube. If your pipette tip does touch anything, discard it and use another fresh pipette tip.

    Wear gloves and be careful when handling the Alkaline Lysis Solution. If it comes into contact with skin wash the affected area immediately.

    Place the sealed PCR tubes in the thermocycler and use the heat block function to heat tubes at 95oC for 20 minutes.

    Select heat block function (2) and then set the temperature to 95oC for 20 minutes.

    Leave tubes to cool and then pipette 75 μl of HotSHOT Neutralising Buffer (from the HotSHOT DNA Extraction Kit) into each labelled PCR tube containing a sample. Again, you can use a fresh pipette tip each time, or use the same pipette tip to carefully squirt the reagent into the tube without touching the sides of the tube. If your pipette tip does touch anything, discard it and use another fresh pipette tip.

    Mix the solutions thoroughly by holding each PCR tube between your thumb and forefinger and inverting the tube several times.

    If you have access to cold storage or ice, you may get better results by putting it on ice or in the fridge to cool it rapidly and improve any precipitation of proteins or settling of suspended tissue.

  2. Labeling and storage

    The PCR tube now contains DNA in neutralised buffer. The crude DNA extract in neutralised HotSHOT buffer (final concentrations 20 mM Tris-HCl and 0.1 mM EDTA, pH) should be stable at room temperature while setting up a PCR. The extract should be stored in the fridge for short term storage (e.g. during the day), and frozen overnight for long term storage if needed.

    For organised storage, we suggest checking the tubes are well sealed, and storing in a small press-to-seal bag. The sample data (date, sample ID, any important metadata) can be written on a small piece of paper and stored inside with the tubes. The outside of the bag can also be labelled with permanent marker with the date of PCR and any relevant information. Multiple bags can be stored in date order in a box in a freezer. Samples should be stored in separate bags and boxes to PCR products to reduce the possibility of PCR contamination. If using this system it is important to only work with one open bag of samples at a time to avoid confusion between identically numbered 0.2 mL tubes.

  3. Dilution prior to PCR

    Your samples may require dilution prior to PCR due to the presence of PCR inhibitors that were co-extracted with bird DNA. A 10x dilution is usually effective in reducing PCR inhibition, but a 20x-50x dilution may also be needed in some cases, especially if the blood spot is large. Dilution is best done immediately prior to PCR because the DNA will degrade if stored only in sterile water.

    To dilute your samples by 10x, you will need your DNA extracts (defrosted if previously frozen) (1), an empty PCR tube for each extract to be diluted (2), a permanent marker pen for labelling (3), a 20 μL micropipette (4), 20 μL pipette tips (5), and sterile distilled or PCR grade water for dilution.

    The first step is to label each tube in a way that allows you to match these to your DNA extract tubes. One approach would be to label your extraction tubes sequentially, e.g. 1-8, and label your dilution tubes 1d-8d.

    Next, for a 10x dilution, pipette 18 μL of sterile distilled water or PCR grade water into each tube. You can use the same pipette tip for all tubes provided it doesn’t touch anything but water and the empty PCR tubes. For a 50x dilution, use 98 μL of sterile distilled water.

    Finally, pipette 2 μL of DNA extract into each appropriate tube, using a new pipette tip each time. Once you have added your DNA extract to the water you can mix it by pipetting up and down, or by stirring. Close each tube once it has been used, and place it away from the tubes that have not yet been diluted to avoid confusion.

    Your DNA extracts are now diluted and are ready to be used for PCR!

    Please note that the diluted DNA extracts are unbuffered and their DNA will degrade much more rapidly than the original extracts. If you need to repeat a PCR it may be best to prepare a new dilution from the original extract.