The least invasive sources of DNA are small feathers plucked from a bird’s breast. There are videos on YouTube that will show you how to do this in a way that is least distressing to the bird. For this DNA extraction protocol to work, the feathers need to be freshly plucked and not moulted.
When you have the feathers, use a new scalpel/razor blade on a clean surface (e.g. a cutting mat/non-scratch surface) to prepare one or two small sections from each feather of approximately 2–3 mm in length. If your feathers are very small then you may need sections from two feathers or more per sample, while if they are large then you may benefit from using only half of a cut section (e.g. 1–2 mm3 diameter of feather tip tissue).
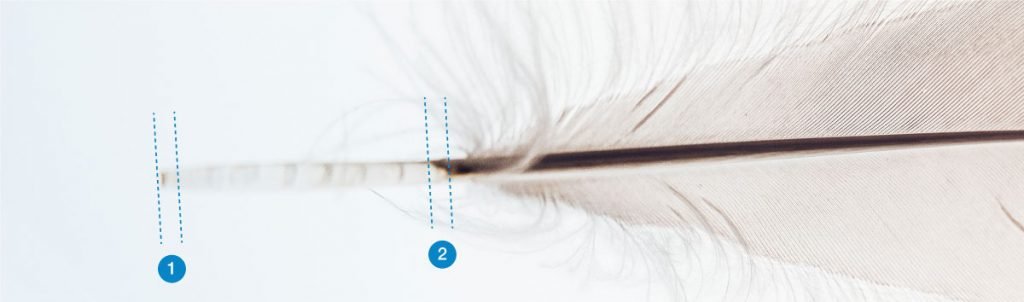
- For smaller feathers, sample from the tip of the feather 1, which should have skin cells attached from being recently plucked.
- For larger feathers, there is also a DNA-rich area where the feather barbs start to sprout from the calamus 2 that contains a DNA-rich blood clot (Horváth et al. 2005).
Place the feather section/s in a PCR tube labelled on the top and side in permanent marker. To avoid sample cross-contamination, sterilise your scalpel/razor blade and cutting surface between feathers.
If you’re using this method for the first time, or trying a new bird species, it can be useful to try several different amounts of feather tips to see which one works best, for example two feather tips vs one feather tip, or a short vs a longer fragment of tip. This should help you find out the amount of feather material that works best for your specific birds.
Even if you only have one sample, it’s good practice to label the tube clearly with a unique identifier for the feather used. It’s also a good idea to mark on the tube the date and to keep a note somewhere of which samples were prepared, and when.