You may have run hundreds of gels, or you may be new to gel electrophoresis, but the Bento Lab gel electrophoresis unit is a little different from other gel electrophoresis systems. We always recommend exploring the manual, but here are a few key tips to get you started.
1. Slide the gel box lid to open
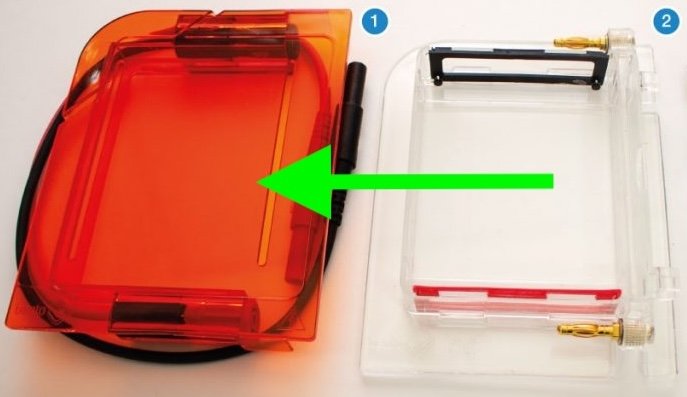
To start with the very basics: the gel box slides open and shut. This is a safety mechanism to protect users from touching the gel when there is a running current.
As shown in the image below, to open the gel box, slide the lid (1) away from the gel tank (2). You can use your thumbs to push the orange lid away, and the rest of your fingers to hold the clear gel tank in place.

2. Cast gels directly with temporary dams
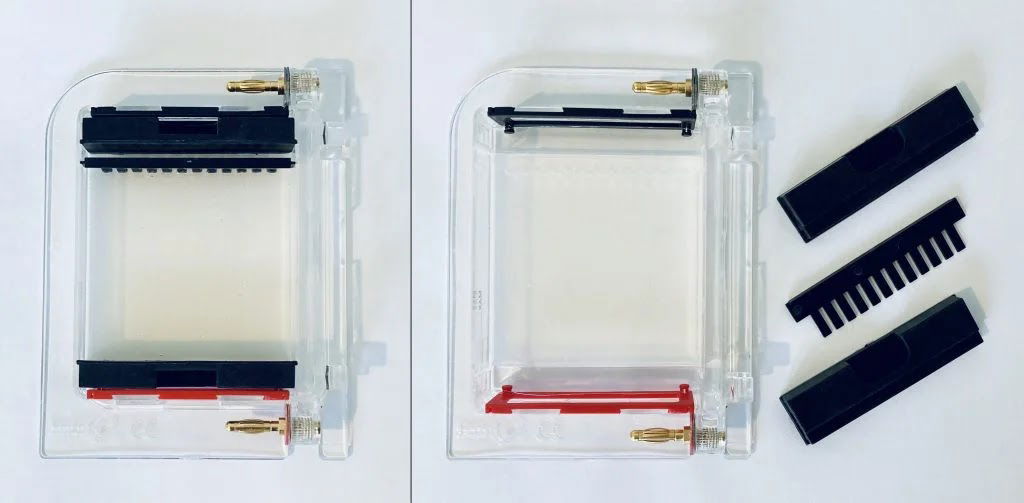
You can cast gels directly in the tank using the black rubber dams. Insert the rubber dams before you pour the agarose to cast a gel. Once the agarose has set, remove the dams to run the gel.
Don’t forget to remove the dams before adding the runner buffer! If they are left in, the rubber dams will prevent current from flowing.

3. Use a blue light compatible DNA stain
Bento Lab uses a blue light transilluminator to visualise DNA. It will work with any blue light compatible DNA stain such as GelGreen®, SYBR™ Green, Midori Green, and others.
When visualising DNA, the blue light from the transilluminator causes the DNA stain dye to fluoresce green if it is bound to DNA, while the background blue light is blocked by an orange filter so only the green fluorescence is visible. You can use the orange Bento Lab gel tank lid or the orange filter in the Gel Imaging Hood to view your results.
4. Improve gel resolution by running at 50–70 V and using 0.5x TBE
Agarose gel electrophoresis is usually done at between 5–10 V per cm. Bento Lab’s gel tank is only 10 cm long, so this would suggest a range of 50–100 V. However, since it’s a small gel tank the gel can quickly heat up and potentially melt at 80 V+, especially if run for a long time. For these reasons we recommend using 50–70 V for best gel resolution. The slower the gel runs, the better quality resolution you will see.
We also recommend using 0.5x TBE (Tris-borate-EDTA) as a running buffer since it has lower conductivity than TAE (Tris-acetate-EDTA) buffer so will run cooler than TAE. You could also explore using SB (sodium borate) and LB (lithium borate) buffers, which are both used in gel electrophoresis to run faster and cooler gels than traditional buffers like TAE and TBE.
5. Use the Gel Imaging Hood and a phone camera to view your gel
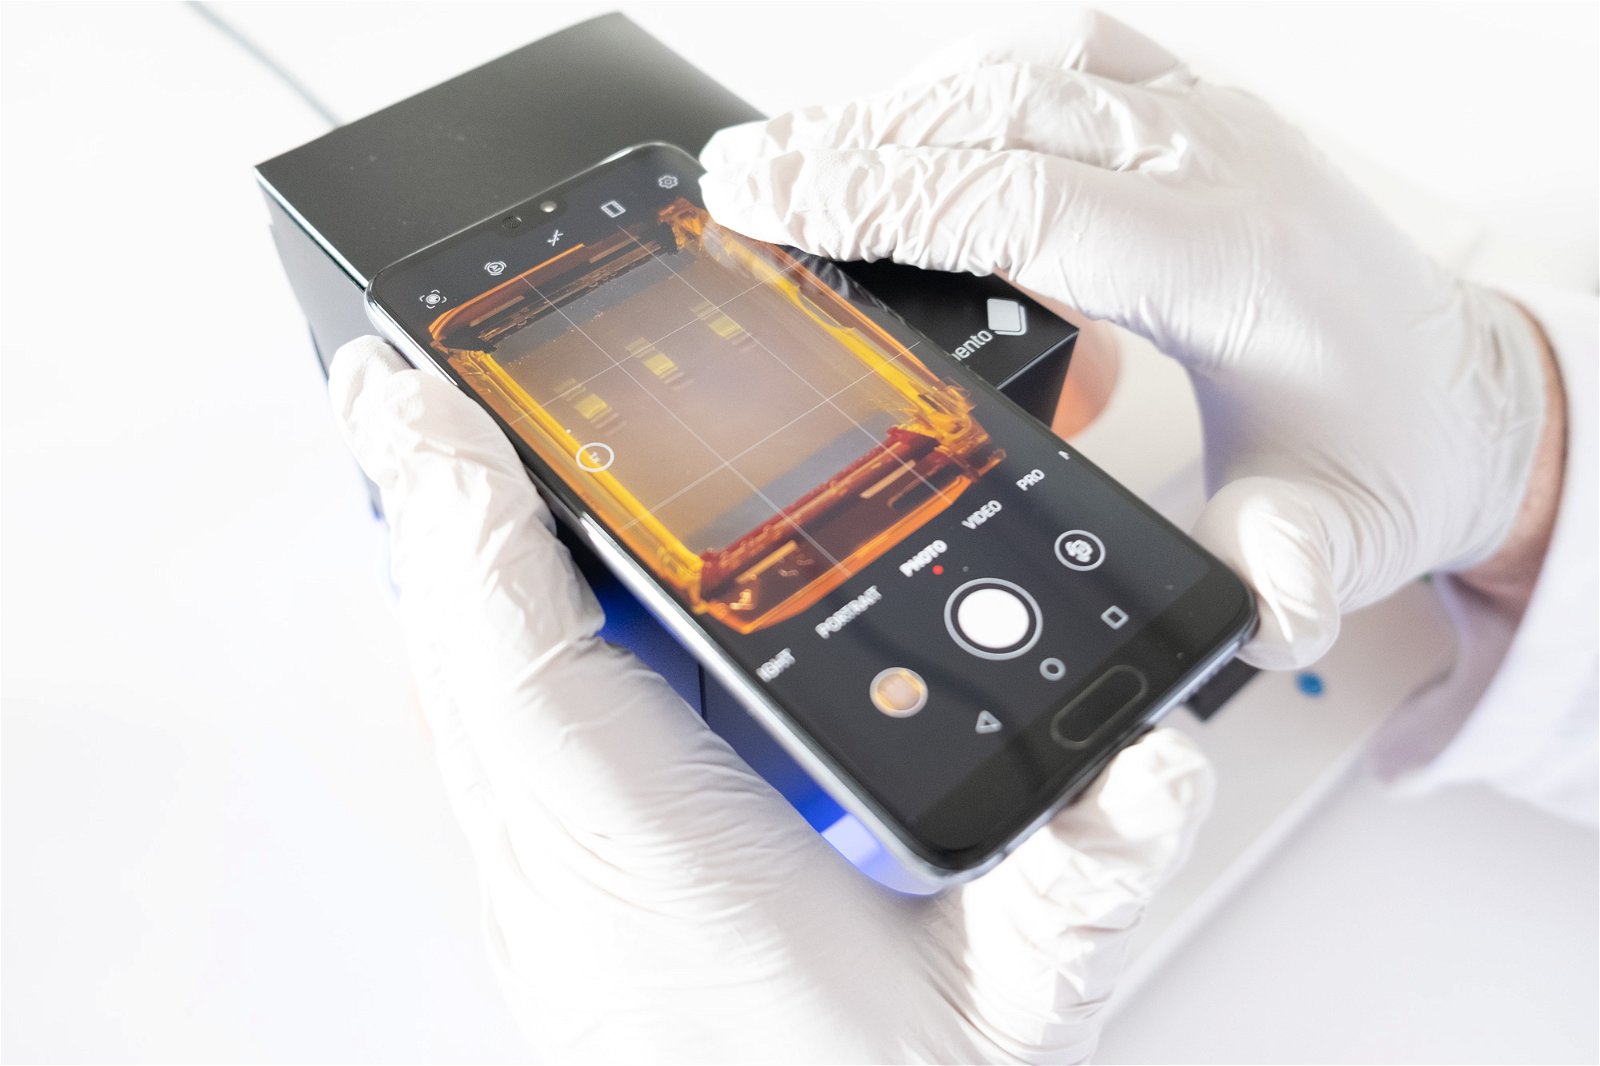
Rather than using a dark room to visualise the gel, we suggest visualising gels by removing the lid of the gel tray, placing the Gel Imaging Hood over the gel, and photographing the bands with a phone camera. You can even use a Pro camera mode to focus on the bands. The Gel Imaging Hood comes with Bento Lab and spares can be bought from our online store.

Hopefully these tips will help you get started with running great gels with Bento Lab!
For the best experience casting, running, and visualising gels, please consult the Gel Electrophoresis and Transilluminator section of the Bento Lab User Manual.
Please let us know what other resources, advice, and tips and tricks for using Bento Lab that you would like us to produce in the future! If you have any comments on this post, or any features you would like more information, please get in touch!
Looking for advice on using Bento Lab?
Book a free consultation or ask a question.