Fridolfsson & Ellegren (1999). A simple and universal method for molecular sexing of non-ratite birds. Journal of avian biology, 116-121. https://doi.org/10.2307/3677252
Bird Sexing PCR Protocol – 2550F/2718R primers
Reagents
- 5x FIREPol® Master Mix Ready To Load or 5x HOT FIREPol® Blend Master Mix Ready to Load
- PCR Grade Water
- Bird Sexing Primer Mix – 2550F/2718R
- Agarose Tablets
- GelGreen® DNA Stain
- 100 bp DNA Ladder
- 10X TBE buffer (to be diluted to 0.5X)
- Deionised water
Consumables
Equipment
- Glass beaker or conical flask
- 2-20 µL Adjustable Pipette
- 20-200 µL Adjustable Pipette
- Bento Lab
- Microwave
Abstract
This protocol allows you to test for the sex of a bird by amplifying a region of the CHD1-Z and CHD1-W genes on the Z and W sex chromosomes, using plucked feathers or dried blood spots as a DNA source.
The 2550F/2718R primer pair was developed by Fridolfsson & Ellegren (1999), who found that these primers produced a single amplicon of ~600–700 bp length in male birds (from the CHD1-Z gene); and two amplicons of ~400–450 bp and ~600–700 bp in female birds (from the CHD1-W and CHD1-Z genes).
This protocol is specific to the 2550F/2718R primer set. These primers will enable you to sex a range of birds including landfowl, pelicans, flamingos, birds of prey and storks.
Protocol
In some cases you may want to dilute your DNA extract in order to reduce PCR inhibition. To do this, prepare 1 in 10 dilutions of your DNA extractions in PCR grade water directly before PCR, as described in the protocols linked above.
PCR

You will need your DNA extractions (1), an empty PCR tube (2), an empty 1.5 mL microcentrifuge tube, the primer mix for this project (3), 5X FIREPol master mix (4), and PCR grade water (5).
The first step is to calculate how much PCR reaction mix you require for your samples.
PCR reaction mix is the combination of 5x FIREPol master mix, primer mix and PCR grade water you will add to each PCR tube before adding your DNA extraction.
For each sample, you will need:
- 4 µL of 5X FIREPol master mix
- 12 µL of PCR grade water
- 2 µL of primer mix
- 2 µL of DNA template
You also need a negative control.
A negative control is a PCR tube of PCR reaction mix that you do not add DNA to. This is used to check your PCR reaction mix is not contaminated.
Are you doing multiple reactions using the same primers?
To reduce costs and save time, we strongly recommend making a batch PCR mix with all the shared reagents, instead of creating each PCR from its individual components. This means less pipetting, and you will use far fewer pipette tips. You can find out more about making batch PCR mixes here.
You can calculate how much of each reagents you will need, plus 10% excess to allow for pipetting inaccuracies or mistakes, using the following equation:
[number of DNA extractions] + [negative control] + 10%
For example, if you have 9 samples from your DNA extractions, and want to include a negative control, use:
9 DNA extractions + 1 negative control + 10% = 11 repeats of PCR reagents
- 11 x 4 µL = 44 µL of Firepol master mix
- 11 x 12 µL = 132 µL of PCR grade water
- 11 x 2 µL = 22 µL of primer mix
In this example, you would use the 20-200 µL adjustable pipette to transfer the 44 µL of Firepol master mix, 132 µL of PCR grade water and 22 µL of primer mix into a 1.5 mL microcentrifuge tube. Make sure to use a fresh pipette tip each time.
Close the lid of the 1.5 mL microcentrifuge tube and invert several times to ensure thorough mixing of your PCR reaction mix.
If you are using a batch PCR reaction mix, once you have produced the batch PCR mix as above, set the 2-20 µL adjustable pipette to 18 µL and transfer 18 µL of PCR reaction mix into the required number of PCR tubes.
If you are not using a batch PCR mix (e.g. only doing one or two samples), use a 2-20 µL adjustable pipette to add each item (4 µL of Firepol master mix, 12 µL of PCR grade water and 2 µL of primer mix) individually to the PCR tube.
Use a permanent marker to label the PCR tubes with your sample names. Label the negative control too so you know not to add DNA to this PCR tube.
Now add the DNA extraction. Set your micropipette to 2 μL.
Using a fresh pipette tip, transfer 2 μL of your DNA extraction into the correspondingly labelled PCR tube containing PCR reaction mix. Then discard your tip.
Make sure to keep your DNA extraction upright and pipette from the surface of the liquid.
The DNA extractions contain PCR inhibitors that will prevent your PCR from being successful if the liquid is mixed.
When you have pipetted the DNA extraction into the PCR tube, close the lid and invert the tube several times to ensure the DNA is mixed into the PCR reaction mix.
Tap the PCR tube firmly on a hard surface to collect the liquid at the bottom and to ensure there are no air bubbles in the liquid.
Place your PCR tubes in the thermocycler block.
Set up the thermocycler with the following PCR program:
2550F/2718R primers
- 4 mins at 94°C (or 15 mins at 94°C if using 5x HOT FIREPol® Blend Master Mix Ready to Load)
- 10 cycles made of 3 steps:
- 30 sec at 94°C
- 30 sec at 60-51°C (9× touchdown steps of 1°C each)
- 30 sec at 72°C
- 30 cycles made of 3 steps
- 30 sec at 94°C
- 30 sec at 50°C
- 30 sec at 72°C
- 5 mins at 72°C
- ∞ at 15°C
(For help setting up a touchdown PCR on your Bento Lab visit the PCR Thermocycler User Manual.)
A standard PCR programme can also be used for use with Bento Lab Entry or thermocyclers without touchdown support:
- 4 mins at 94°C (or 15 mins at 94°C if using 5x HOT FIREPol® Blend Master Mix Ready to Load)
- 35 cycles made of 3 steps:
- 30 sec at 94°C
- 30 sec at 51°C (temperature can be slightly increased if there is non-specific amplification, or reduced if bands are faint)
- 30 sec at 72°C
- 5 mins at 72°C
- ∞ at 15°C
If you need help operating the Bento Lab thermocycler, check the manual. You can use the PCR preset (1), then modify (2) the program to the required settings (3) before running the program (4).
The program will run for ca 2 hours. When it is finished, you can keep the result in the freezer, or use it right away for gel electrophoresis.
Gel Electrophoresis
Follow the Gel Electrophoresis Protocol to pour a gel and run it with your PCR results, negative control and a 100bp ladder.
For this protocol you will need to pour a 2% gel (2 agarose tablets in 50 mL of 0.5X TBE, or 1 agarose tablet in 25 mL of 0.5X TBE) with a single gel comb, load your samples, and run the gel at 50V for 45 minutes for a half-gel run (after which the bands should be visible) or for 1 hr 15 minutes for a full-length gel run and better band separation.
You can visualise the gel after ~15 minutes to check for the presence of bands. Running for longer will allow bands to separate so you can determine the sex of your samples.
Visualising the Gel
You can now visualise your gel by placing it on your Bento Lab’s blue light transilluminator.
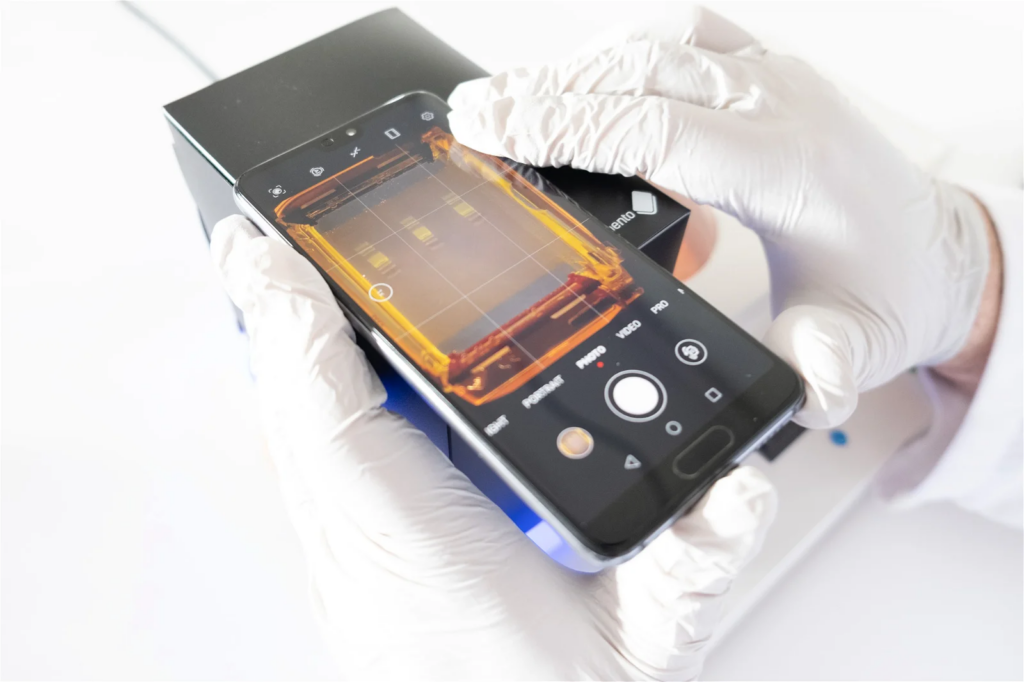
For best visualisation you can use a smartphone camera to take an image of the gel using the Gel Imaging Hood (included with Bento Lab)
To do this, place the gel tray open on the blue transilluminator (being careful not to spill any of the running buffer), and place the assembled Gel Imaging Hood over the gel tray.
For ideal visibility, imaging should be done away from direct light. The darker it is, the better the contrast will be.
If your Bento Lab transilluminator is in direct light, you can block out some of the incoming light with one hand against the Gel Imaging Hood to get better contrast.
On the Bento Lab interface, you can turn the transilluminator light on by selecting the light bulb icon (1) and clicking the orange wheel button.
You can also increase and decrease the intensity of the light by selecting the light bulb icon, holding down the orange wheel button with two fingers, and rotating it left or right.

By placing your smartphone camera lens over the orange filter at the top of the Gel Imaging Hood and activating your phone camera, you will be able to see the bands of DNA fluoresce in the gel. You can then take a digital photograph to document your gel results.

If you have a smartphone with a “Pro” camera mode, you could try manually adjusting the focus so that it focuses exactly on the bands of interest to get a better image.
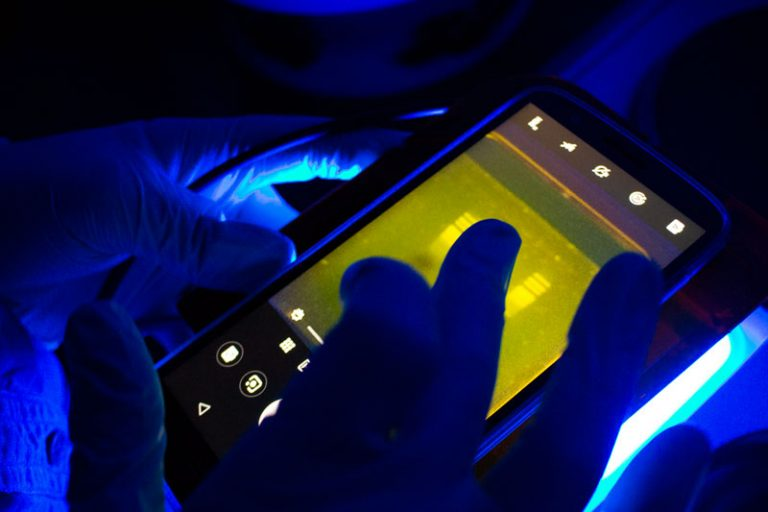
Another way of visualising the agarose electrophoresis gel is to use the orange lid of the electrophoresis tank as a filter for visualisation. This method is best suited for use in a dark room, or for a quick visual check while the gel is running.
To do this, first remove the lid and wipe away any condensation (if it is present), and then replace the lid. Through the orange lid, you will be able to see the bands of DNA fluoresce at their positions in the gel.
To photograph the gel using the orange lid, remove the lid, wipe away any condensation, and hold it over your phone’s camera lens to take a picture and document your experiment’s results. However, the contrast will be inferior to images using the Gel Imaging Hood unless the room is very dark.

Analysing your results
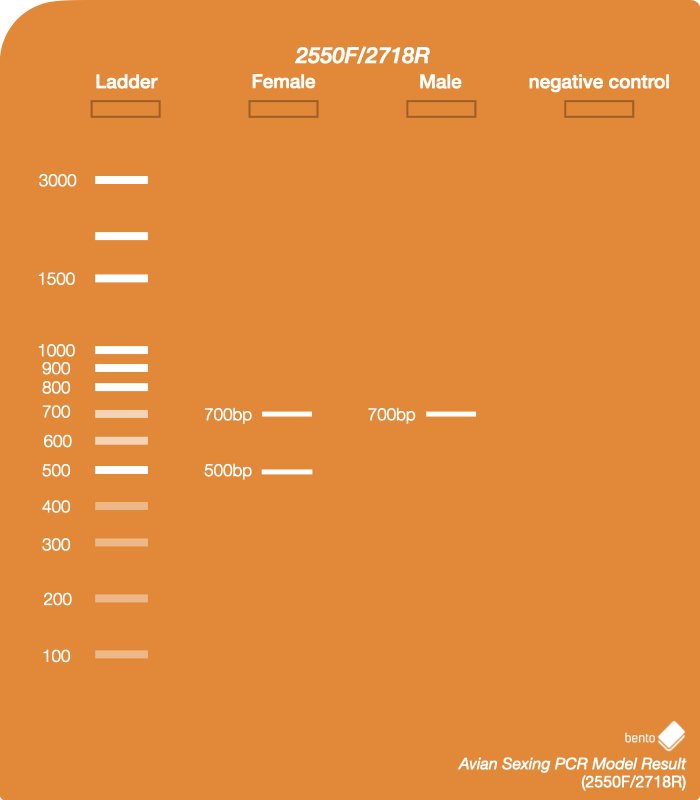
Compare the picture of your gel to this example result, which has been run with all variations. Your sample should correspond to one of these variations.

1 – Ladder – 100 bp DNA Ladder
2 – Female chicken DNA using 2550F/2718R primers – two distinct bands: one at ~500bp and one at ~700bp.
3 – Male chicken DNA using 2550F/2718R primers – one band at ~700bp.
4 – Negative control – there should not be any bands in this lane. If there are, it is likely that your PCR reaction mix was contaminated and you need to repeat the PCR.
Your results – two bands indicate DNA is from a female bird and one band indicates DNA is from a male bird.
Do not worry if the bands from your samples are slightly different sizes to the example gel above. Band sizes vary depending on the species of bird you have extracted DNA from. However, bands that are smaller than the 100 and 200 bp bands on the DNA ladder are likely to be residual primers or non-specific amplification rather than genuine results.
If your gel has not run long enough to separate the bands of interest, you can put the gel tank lid back on and run it for longer to increase the band separation.
Cleaning up
After you have taken good photos of the gel for your documentation and records, you can pour the running buffer down a drain, and dispose of the gel in your regular bin.
Always wear gloves when cleaning out the gel tank, and be careful touching anything else until you’ve taken them off, because it could be a source of PCR product contamination (see our resource on avoiding contamination here).
Drain disposal of TBE buffer, and bin diposal of agarose gels, are standard waste disposal procedures followed by research labs. If you have questions, get in touch with us.