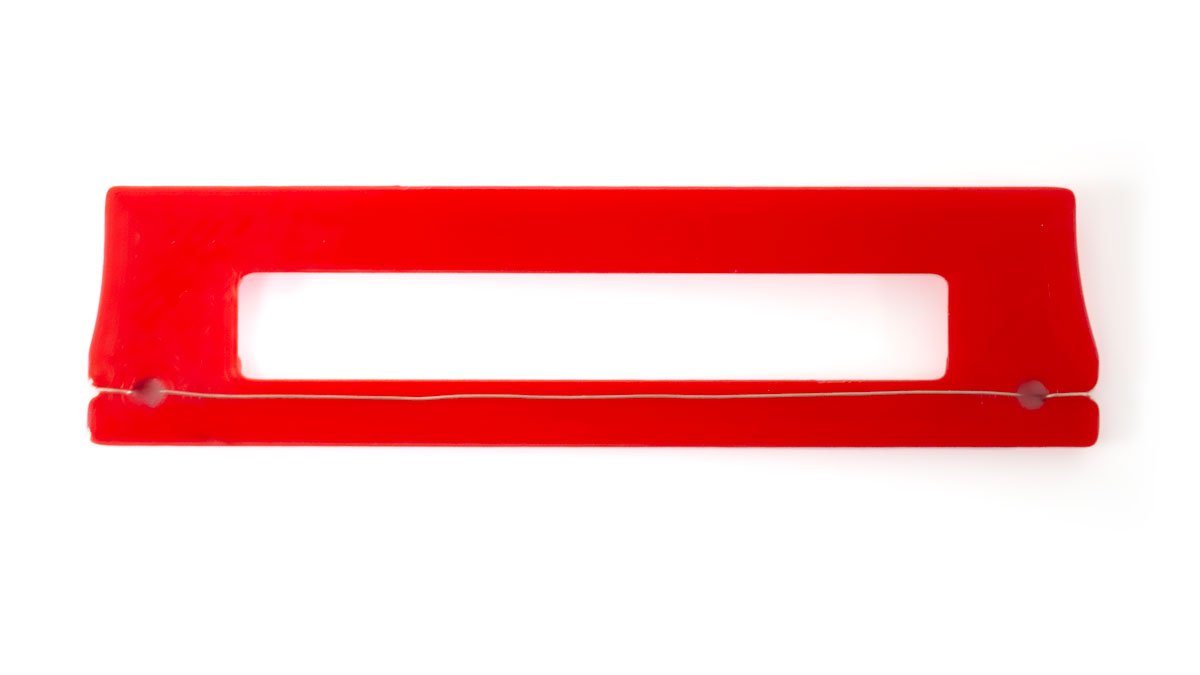
Bento Lab’s gel box has two replaceable platinum electrodes.
The electrode is made up of a colored plastic frame (red or black) that holds the platinum wire in place.
Please note: The platinum wire itself is fragile and must be handled with care. Take extra care when cleaning the gel box and consider carefully removing the electrodes first.
This guide covers how to remove and replace the platinum electrodes.
For example, you may want to remove the electrodes temporarily in order to thoroughly clean the gel box. Or you may want to replace old electrodes with a new pair.
Removing the electrode from the gel box
Be careful not to accidentally damage the platinum wire.
Do not attempt to remove the electrode from the tray without first disconnecting the wire.
Read this guide in its entirety before attempting to remove the electrode.
Step 1: Loosen the banana plug and the plates (or washer) holding the wire
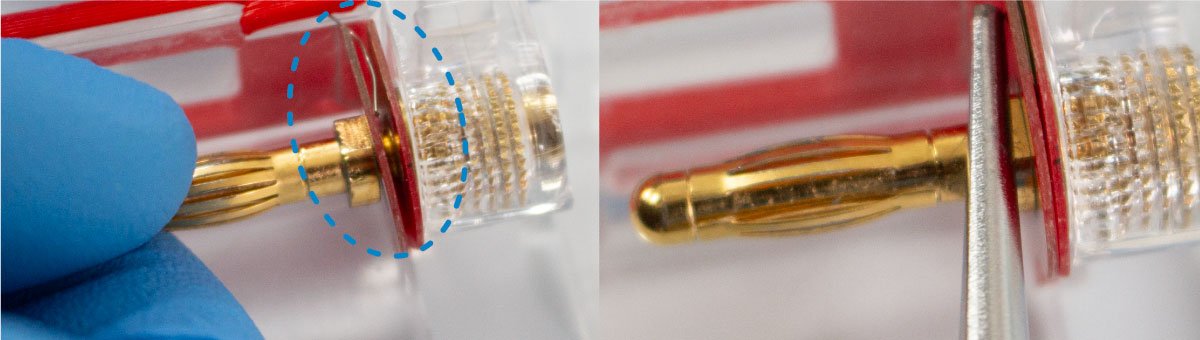
The electrode wire is connected to the banana plug on the tray either by a round metal washer (1), or by two contact plates in the color of the electrode (2), either red or black.
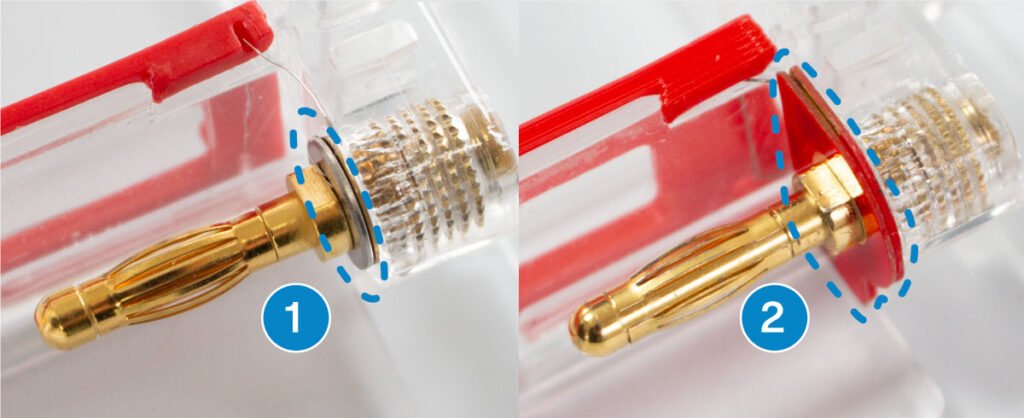
If your wire is connected between two colored contact plates, loosen the banana plug slightly. This can most easily be done with small spanners or pliers. Once the color contact plates come apart slightly, the wire can be removed without breaking it.
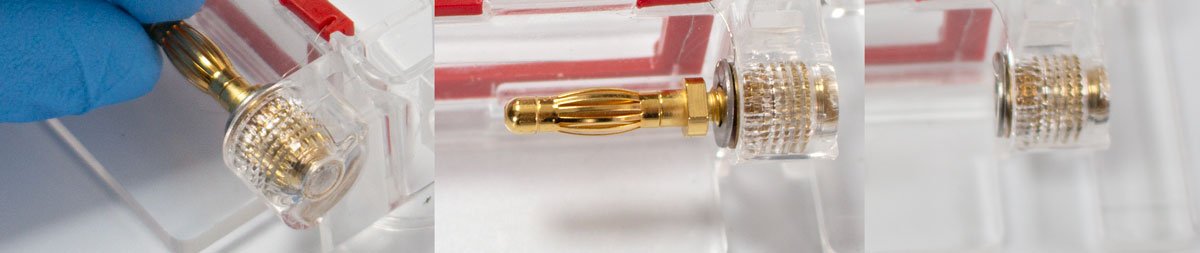
On older gel trays, the electrode wire is attached to a metal washer. In this case, fully unscrew the banana plug so that you can carefully remove the washer with the electrode.
Step 2: Identify your electrode version
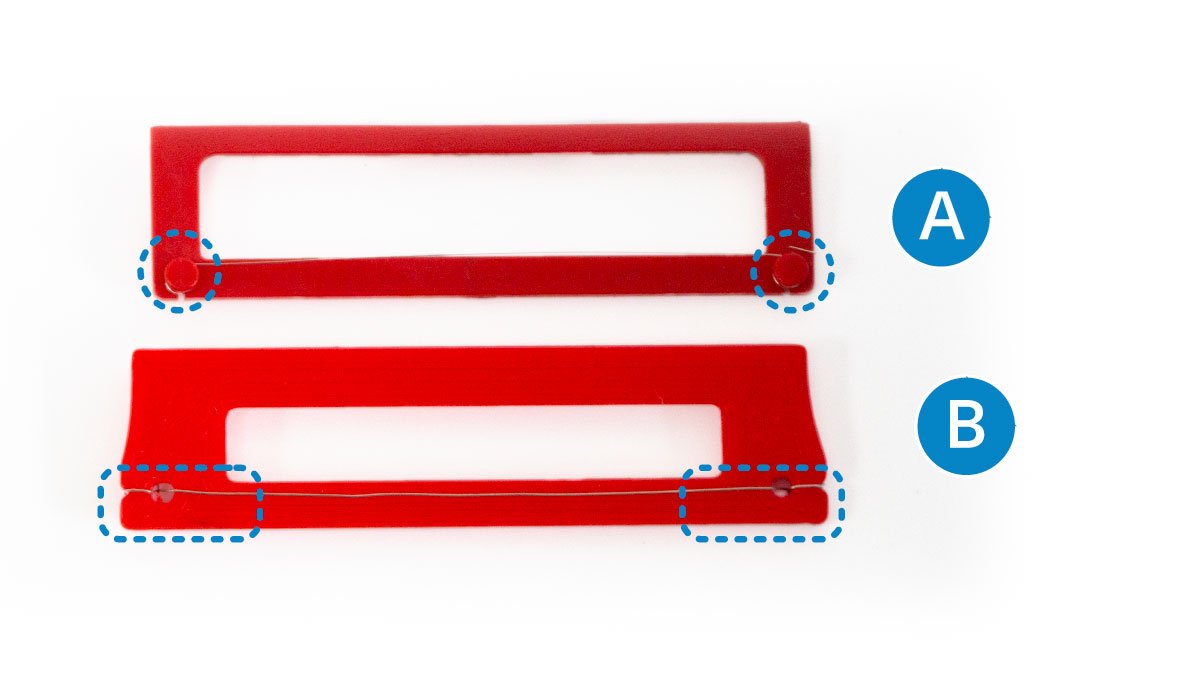
There are two different versions of the electrode:
- On Version A, the platinum wire is wound around a round feature on the electrode.
- On Version B, the platinum wire is wound around the side of the electrode
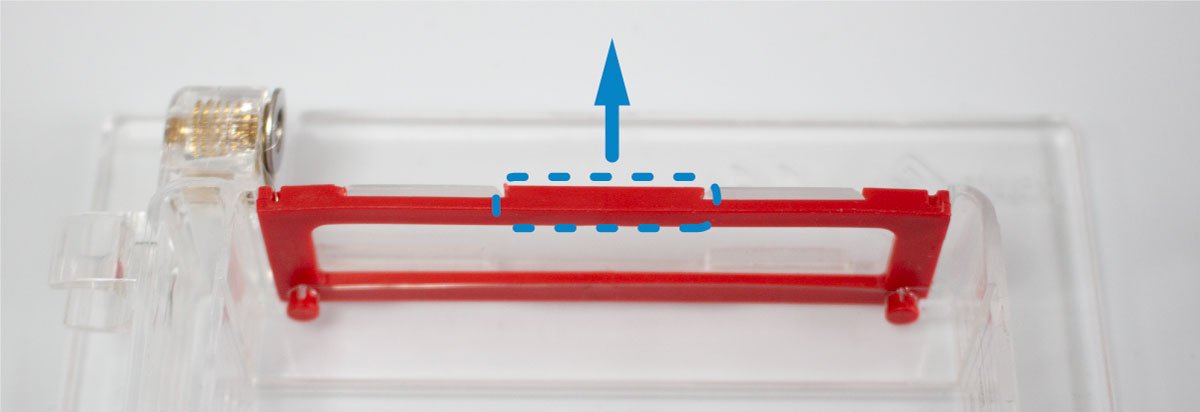
Step 3: Take out the electrode frame
Make sure the platinum wire is no longer attached to the tray before attempting to take out the electrode frame in this step.
If your electrode is Version A, you can take the electrode out by holding the frame at the top and gently pulling it up.
If your electrode is Version B, you can most easily remove it with a long object such as a pen, or a screwdriver. Gently push the electrode up in the middle as show in the image below. Hold the electrode at the same time as pushing it, to control the force. Be careful not to damage the flanges at the bottom of the tray holding the electrode in place.
Installing a new electrode
Please read the entire guide before attempting to install the electrode.
This guide covers how to install new electrodes (type B).
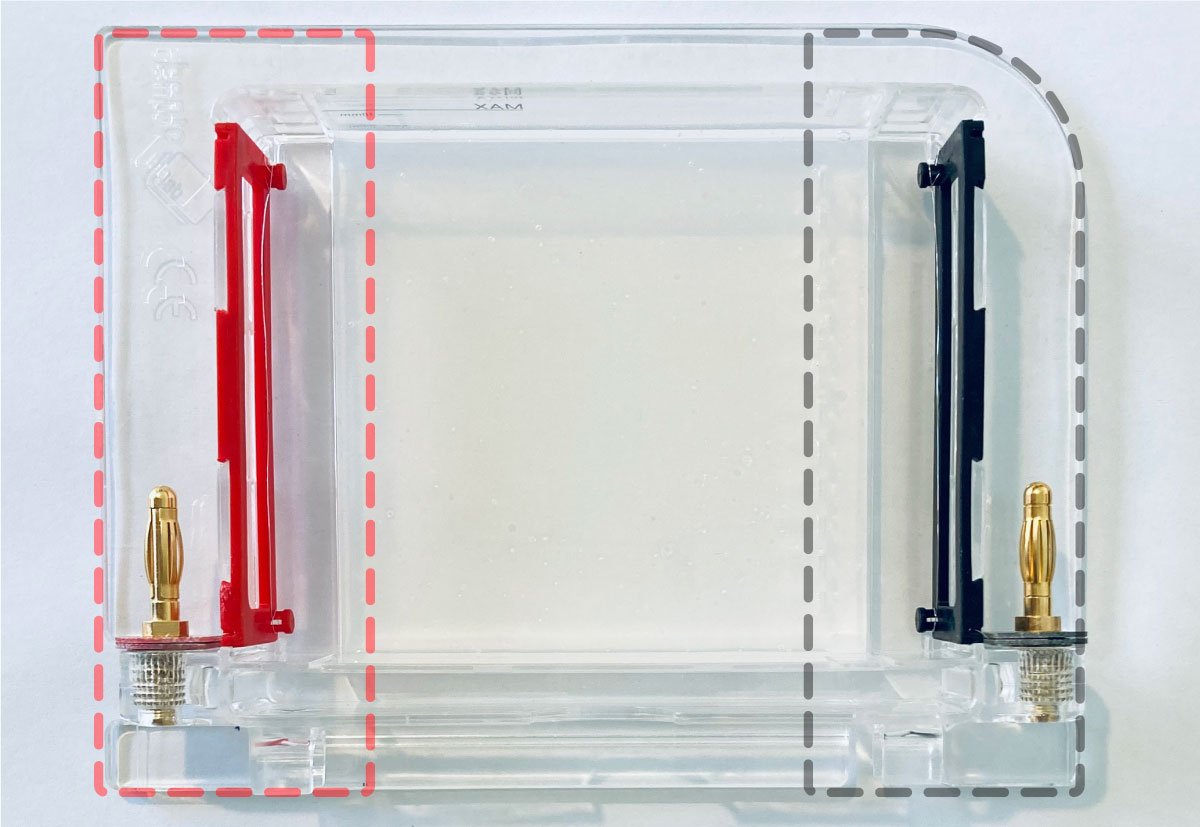
Step 1: Identify the correct position
First, make sure you are installing the electrode on the right side:
The black electrode is on the curved edge of the gel tray, the red electrode goes on the straight edge of the gel tray. This way, when you close the amber lid of the gel box, the wire colors will match the electrode color.
Step 2. Ensure the electrode wire is straight
Before installing a new electrode, ensure the wire is straight from hole to hole.
Step 3. Ensure the wire is bent correctly for connection to the tray
On the backside of the electrode, the wire travels up. This is on the right side of the red electrode, and on the left side of the black electrode. Make sure that the wire travels up straight and then has a 90° angle bend. This is where the wire will connect to the contact plates of the tray.
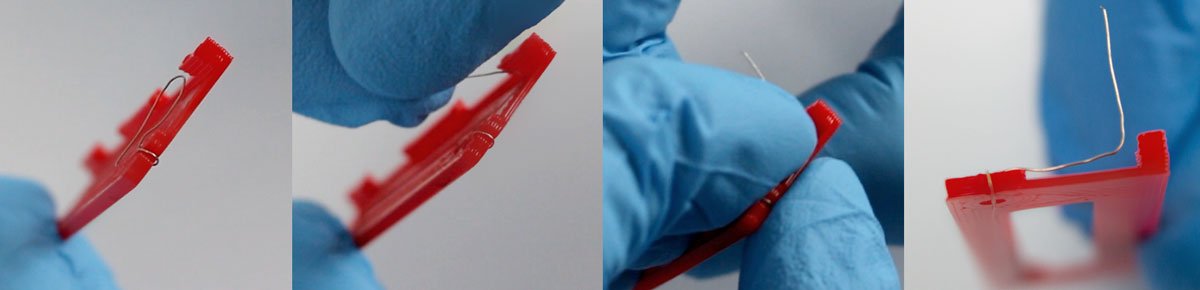
Note: In these pictures a thicker wire has been used for clarity.
Step 4. Mounting the Electrode
To mount the electrode, place the electrode on the correct side of the tray. Make sure the straight exposed wire is at the front (pointing into the tray) and at the bottom.
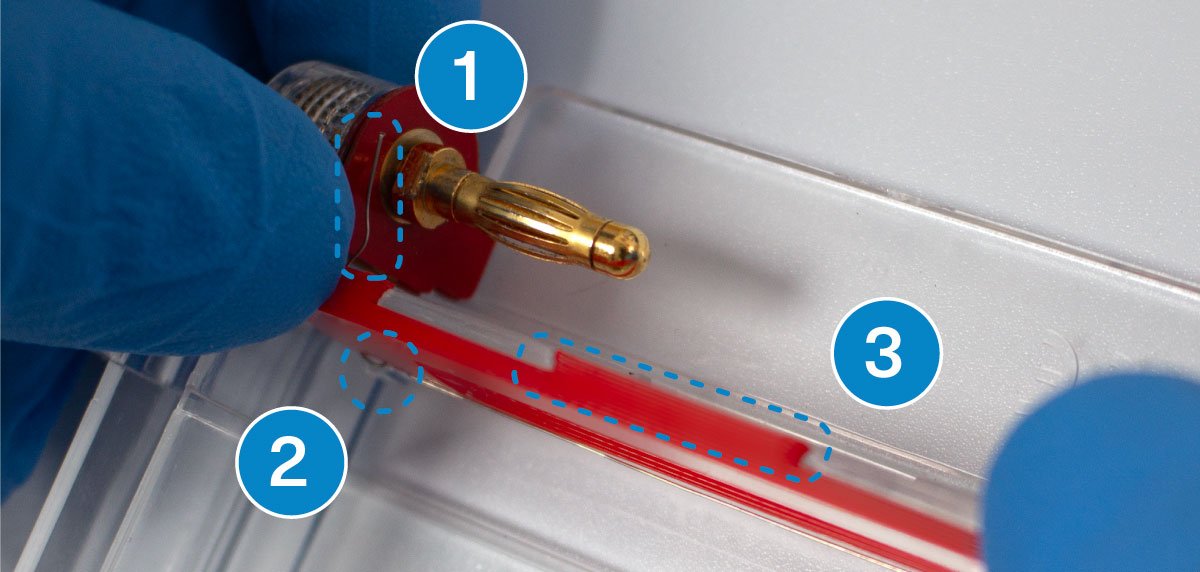
Confirm that the bent wire points at the contact plates (1). Place the electrode so that the bottom corners are behind the small flanges at the bottom corners of the tray (2). Align the press-fit features of the top of the electrode frame with the cut-outs of the gel tray (3).

Now carefully push the electrode frame down. It will require some strength to push it securely in place. Be careful not to twist the electrode forward which could off the flanges. Ensure the electrode is evenly pushed in by pressing down on each of the three sections at the top of the frame.
Finally, it is time to reconnect the electrode to the contact plate. Simply insert the wire between the two plates, and then tighten the banana plug. You can use your fingers to tighten the banana plugs. As you tighten the banana plug, ensure that the wire stays within the two contact plates and that it does not stick out in a way where it can easily be damaged (e.g. by the lid of the gel box). To tighten the banana plug most securely, use small pliers.