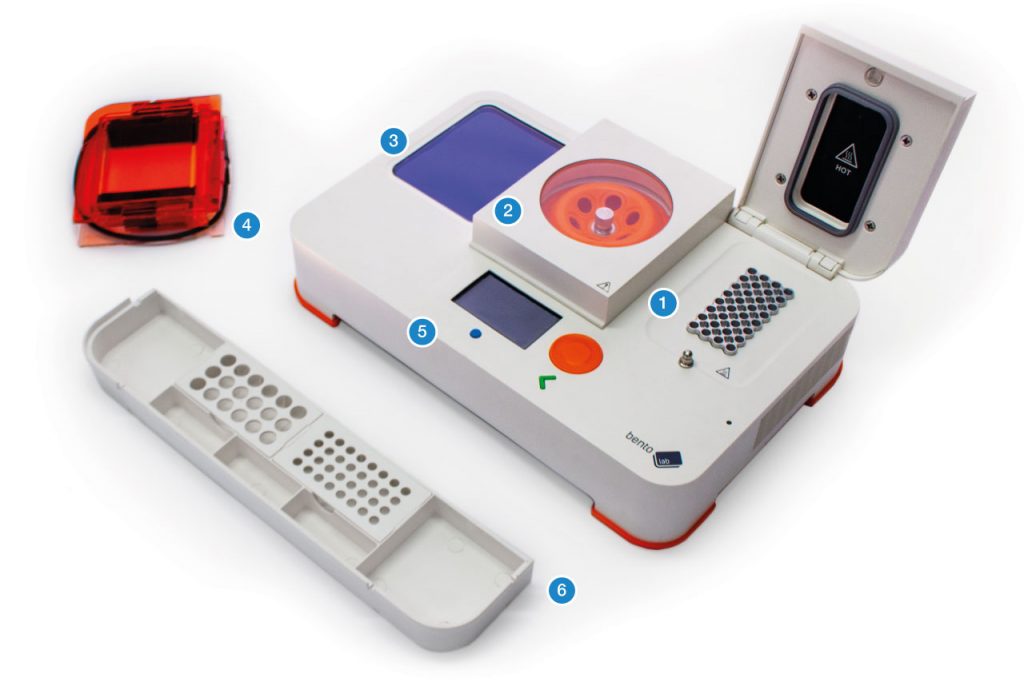
Bento Lab contains a thermocycler module 1 a microcentrifuge 2, a blue LED transilluminator 3 and a gel electrophoresis power supply used with an external gel electrophoresis container 4.
The system is operated using an intuitive on-board graphical interface 5, and comes with a convenient tube rack 6.
Interface Area
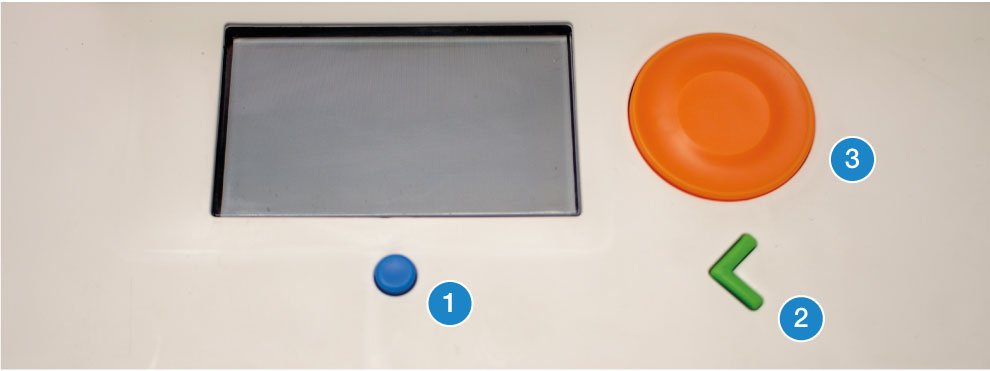
Bento Lab has three physical buttons. The blue round button 1 under the screen is the HOME button and always takes the user back to the overview screen from where all the modules can be selected. The green button shaped like an arrow, “<” 2 is the BACK button and depending on the context takes the user back one step or undoes an action. In addition, there is an orange click-dial 3 which is used to select elements on the screen and change values.
You can find more about how the user interface works in the interface chapter.
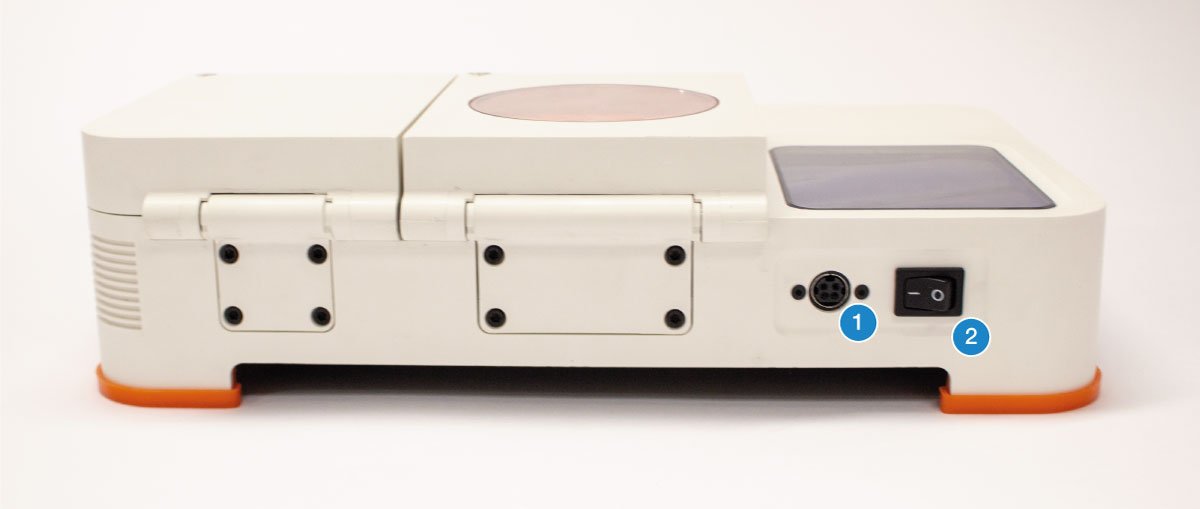
Physical Description – Sides
At the back, Bento Lab has a 4-pin power connector (1) and a physical power switch (2).
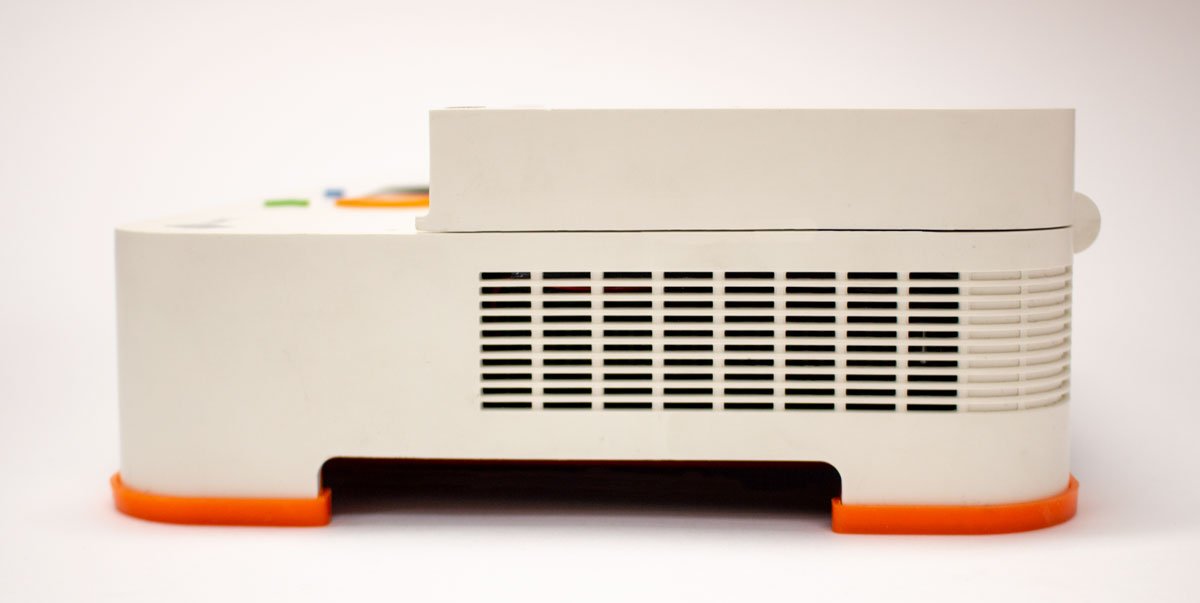
On the right side, Bento Lab has vents for the active fan cooling of the thermal cycler’s heat sink.
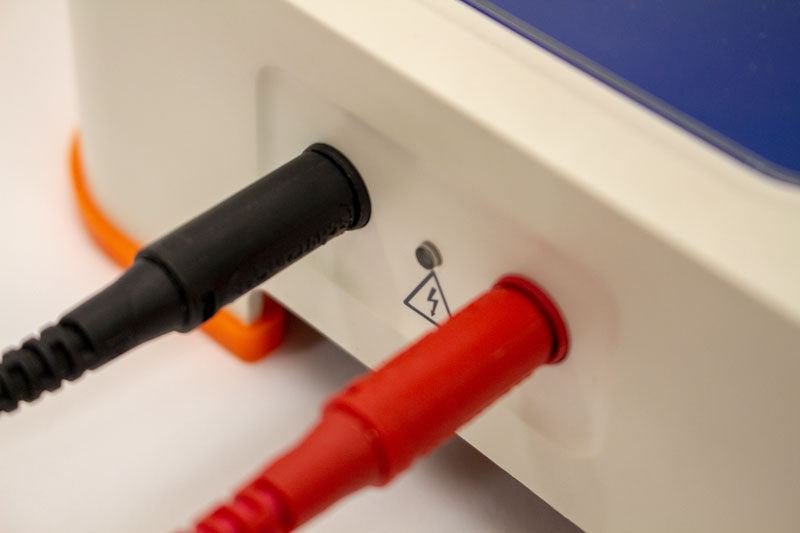
On the left side, Bento Lab has red and black connectors for the gel electrophoresis power supply.
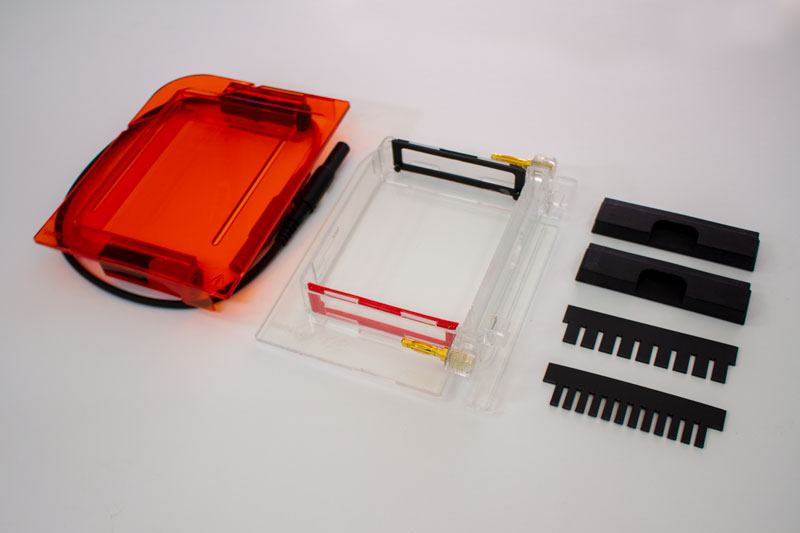
Bento Lab comes with an external gel electrophoresis container with two rubber dams to create buffer zones during casting, a 9 well comb and a 12 well comb. The current for gel electrophoresis is run through the lid which connects to the Bento Lab gel electrophoresis power supply. The lid also doubles as an orange filter for the blue light transilluminator. See how to assembly the gel imaging hood here.
Unpacking and Inspection
Carefully unpack the unit and ensure Bento Lab, including tube rack and gel box, and power supply are present. If the equipment appears damaged in any way, contact us at [email protected] HS.
Please retain packaging to return equipment for servicing.
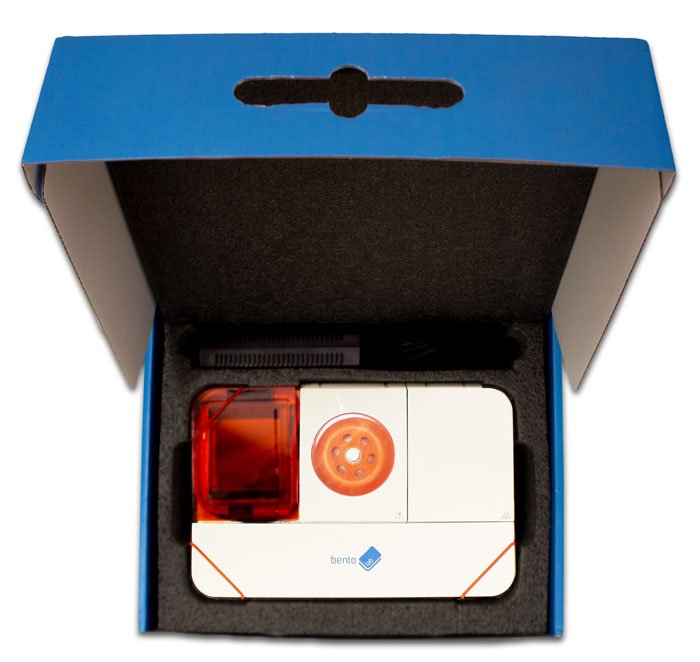
Bento Lab in packaging – retain packaging to return equipment for servicing
Ensure that Bento Lab is placed on a solid, level surface, to support and balance its weight.
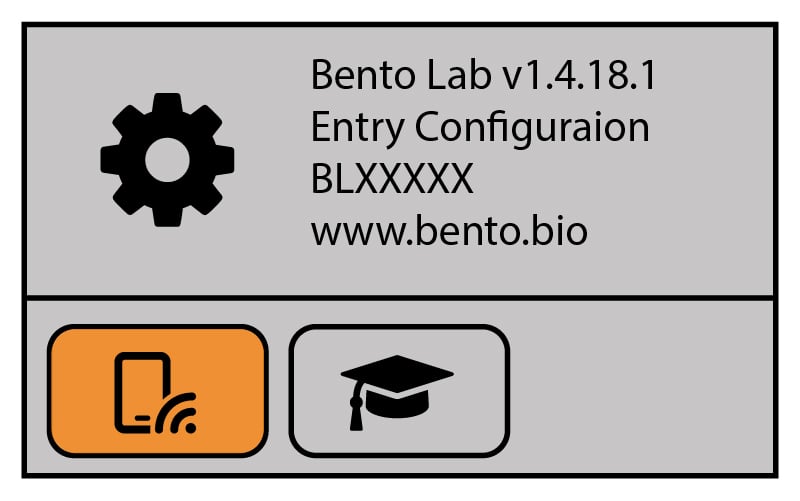
Identifying Device Model
To identify your Bento Lab model (Pro or Entry), see the table below:
Bento Lab Entry |
Bento Lab Pro |
|
|---|---|---|
| Baseplate Sticker |
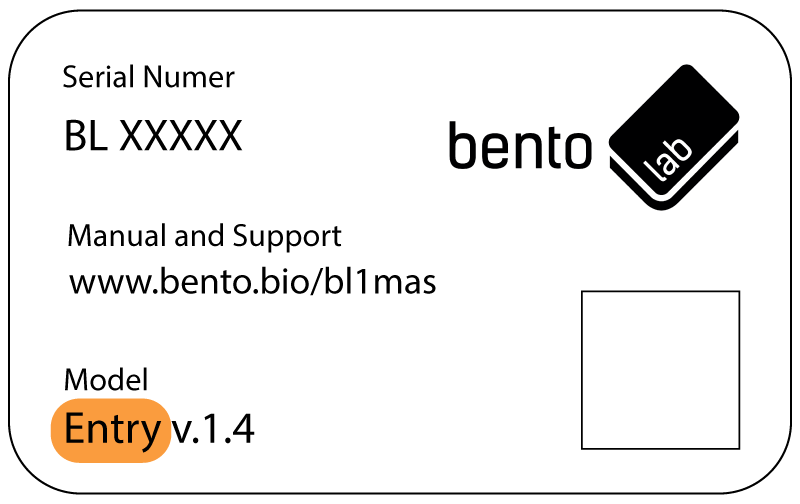 “Entry” in identifier
|
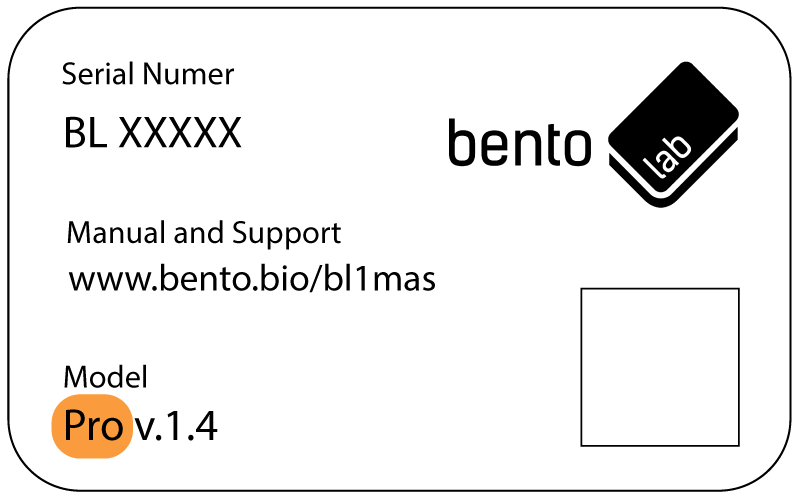 “Pro” in identifier
|
| Settings Screen |
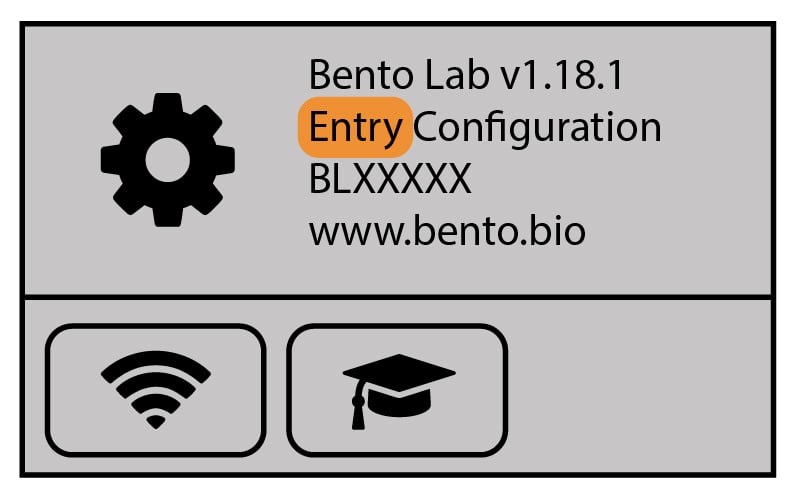 “Entry Configuration”
|
 “Pro Configuration”
|
If you’d like to update your Bento Lab to use the mobile app, the device must have built-in Bluetooth hardware. Here are some ways to determine whether your device includes Bluetooth (new version) or Wi-Fi (old version):
|
Wi-Fi
before April 2024
|
Bluetooth
latest
|
|
|---|---|---|
| Hardware | Version 1.3 or below | Version 1.4 and later |
| Serial Number | Up to BL12999 | BL13300 and above |
| Settings Screen |
 Has Wifi button
|
No Wifi button |
To connect your Bento Lab to the Bento Bio app your Bento Lab should run version 1.4.18 or later. If your Bento Lab is capable of bluetooth but runs an earlier software version, update your Bento Lab using this guide.
Servicing
Bento Lab contains no user-serviceable parts. Refer all repairs to qualified service personnel. Opening the product voids the warranty. For servicing contact us at [email protected] for more info.
Troubleshooting
If you identify a fault with your lab, please contact us at [email protected].