DNA Barcoding PCR Protocol (using Primer Mix)
Reagents
- 5x HOT FIREPol® Blend Master Mix Ready To Load
- PCR Grade Water
- DNA Barcoding Primer Mixes
- Agarose Tablets
- GelGreen® DNA Stain
- 100 bp DNA Ladder
- 10X TBE buffer (to be diluted to 0.5X)
- Deionised water
Consumables
Equipment
- Glass beaker or conical flask
- 2-20 μl Adjustable Pipette
- 20-200 μl Adjustable Pipette
- Bento Lab
- Microwave
Abstract
What does this experiment test?
This protocol will allow you to identify a fungus, bird, mammal or plant you have sampled and extracted DNA from.
In the same way as the barcode on an item you buy at the supermarket can be scanned to bring up the details of the item, all species can be identified from their unique DNA barcode. The DNA barcode is a sequence of DNA that varies sufficiently between different species for them to be taxonomically differentiated, but is flanked by sequences of DNA that are the same for all of these species for primers to bind to. Primers are short sequences of DNA that indicate which region of DNA is to be amplified in a PCR.
What are the genetics?
This project will produce a sequence of DNA, or DNA barcode, that can be sent for sequencing and compared against existing DNA databases to find the identity of the fungus, bird, mammal or plant sampled.
Protocol
Prior to starting this protocol, you should have obtained DNA from your sample(s) using the DNA Extraction for Barcoding or DNA Extraction from Feathers protocol. This will take ~20 minutes, at the end of which you should have a concentrated DNA extraction in a PCR tube and a 1 in 10 dilution of this DNA extraction in water. If you stored these in the freezer after the DNA extraction protocol, transfer them to the fridge for ~1 hour and allow them to partially defrost before starting this protocol
PCR
In this step, you will use PCR to amplify the DNA barcode for your samples. This will take about 3 hours, but most of it will be waiting time. The primer mix you use will depend whether you have sampled a fungus, bird, mammal or plant:
- ITS1F/ITS4 for fungi
- Bird F1/Bird R1 for birds
- LCO1490/HCO2198 for mammals
- rbcL for plants

You will need your DNA extractions (1), an empty PCR tube (2), an empty 1.5 mL microcentrifuge tube, the primer mix for this project (3), 5X FIREPol master mix (4), and PCR grade water (5).
The first step is to calculate how much PCR reaction mix you require for your samples.
PCR reaction mix is the combination of 5x FIREPol master mix, primer mix and PCR grade water you will add to each PCR tube before adding your DNA extraction.
For each sample, you will need:
- 4 µL of 5X FIREPol master mix
- 12 µL of PCR grade water
- 2 µL of primer mix
- 2 µL of DNA template
You also need a negative control.
A negative control is a PCR tube of PCR reaction mix that you do not add DNA to. This is used to check your PCR reaction mix is not contaminated.
Are you doing multiple reactions using the same primers?
To reduce costs and save time, we strongly recommend making a batch PCR mix with all the shared reagents, instead of creating each PCR from its individual components. This means less pipetting, and you will use far fewer pipette tips. You can find out more about making batch PCR mixes here.
You can calculate how much of each reagents you will need, plus 10% excess to allow for pipetting inaccuracies or mistakes, using the following equation:
[number of DNA extractions] + [negative control] + 10%
For example, if you have 9 samples from your DNA extractions, and want to include a negative control, use:
9 DNA extractions + 1 negative control + 10% = 11 repeats of PCR reagents
- 11 x 4 µL = 44 µL of Firepol master mix
- 11 x 12 µL = 132 µL of PCR grade water
- 11 x 2 µL = 22 µL of primer mix
In this example, you would use the 20-200 µL adjustable pipette to transfer the 44 µL of Firepol master mix, 132 µL of PCR grade water and 22 µL of primer mix into a 1.5 mL microcentrifuge tube. Make sure to use a fresh pipette tip each time.
Close the lid of the 1.5 mL microcentrifuge tube and invert several times to ensure thorough mixing of your PCR reaction mix.
If you are using a batch PCR reaction mix, once you have produced the batch PCR mix as above, set the 2-20 µL adjustable pipette to 18 µL and transfer 18 µL of PCR reaction mix into the required number of PCR tubes.
If you are not using a batch PCR mix (e.g. only doing one or two samples), use a 2-20 µL adjustable pipette to add each item (4 µL of Firepol master mix, 12 µL of PCR grade water and 2 µL of primer mix) individually to the PCR tube.
Use a permanent marker to label the PCR tubes with your sample names. Label the negative control too so you know not to add DNA to this PCR tube.
Now add the DNA extraction. Set your micropipette to 2 μL.
Using a fresh pipette tip, transfer 2 μL of your DNA extraction into the correspondingly labelled PCR tube containing PCR reaction mix. Then discard your tip.
Make sure to keep your DNA extraction upright and pipette from the surface of the liquid.
The DNA extractions contain PCR inhibitors that will prevent your PCR from being successful if the liquid is mixed.
When you have pipetted the DNA extraction into the PCR tube, close the lid and invert the tube several times to ensure the DNA is mixed into the PCR reaction mix.
Tap the PCR tube firmly on a hard surface to collect the liquid at the bottom and to ensure there are no air bubbles in the liquid.
Place your PCR tubes in the thermocycler block.
Set up the thermocycler with the following PCR program:
PCR program for ITS1F/ITS4 primers (fungi):
- Initial denaturing: 15 mins at 95°C
- 35 cycles made of 3 steps
- Denaturing: 30 secs at 95°C
- Annealing: 30 secs at 55°C*
- Extension: 45 secs at 72°C
- Final extension: 10 mins at 72°C
- Store: ∞ at 15°C
Total run-time = 138 mins
PCR program for Bird F1/R1 primers (birds):
- Initial denaturing: 15 mins at 95°C
- 6 cycles made of 3 steps:
- Denaturing: 60 secs at 94°C
- Annealing: 90 secs at 45°C*
- Extension: 90 secs at 72°C
- 35 cycles made of 3 steps
- Denaturing: 60 secs at 94°C
- Annealing: 90 secs at 55°C*
- Extension: 90 secs at 72°C
- Final extension: 5 mins at 72°C
- Store: ∞ at 15°C
Total run-time = 253 mins
PCR program for LCO1490/HCO2198 primers (mammals):
- Initial denaturing: 15 mins at 95°C
- 35 cycles made of 3 steps
- Denaturing: 60 secs at 95°C
- Annealing: 60 secs at 40°C*
- Extension: 90 secs at 72°C
- Final extension: 7 mins at 72°C
- Store: ∞ at 15°C
Total run-time = 217 mins
PCR program for rbcL primers (plants):
- Initial denaturing: 15 mins at 95°C
- 35 cycles made of 3 steps
- Denaturing: 30 secs at 94°C
- Annealing: 45 secs at 54°C*
- Extension: 45 secs at 72°C
- Final extension: 5 mins at 72°C
- Store: ∞ at 15°C
Total run-time = 143 mins
(For help setting up a PCR on your Bento Lab visit the PCR Thermocycler User Manual.)
* The primer annealing temperatures listed here are a good starting point based on published studies. Depending on your target organism, you might find that slightly increasing the temperature (to reduce non-specific amplification) or decreasing the temperature (to improve the ability of the primer to bind to the target DNA, especially in the case of mismatches) helps improve your results. If you are working on a specific group of organisms, you can often find recommended annealing temperatures for these primers in published scientific articles about that group.
If you need help operating the Bento Lab thermocycler, check the manual. You can use the PCR preset (1), then modify (2) the program to the required settings (3) before running the program (4). This figure shows example settings – please consult the specific protocol for recommended PCR program settings.
The program will run for ca 2 hours. When it is finished, you can keep the result in the freezer, or use it right away for gel electrophoresis.
Gel Electrophoresis
Follow the Gel Electrophoresis Protocol to cast a gel and run it with your PCR result, and a 100bp ladder. This protocol requires a 1.5% gel (1 agarose tablet in 33 ml of 0.5X TBE). Once you have loaded the gel with your samples, run the gel for 30 mins at 50V to see whether you have bands.
Visualising the Gel
You can now visualise your gel by placing it on your Bento Lab’s blue light transilluminator.
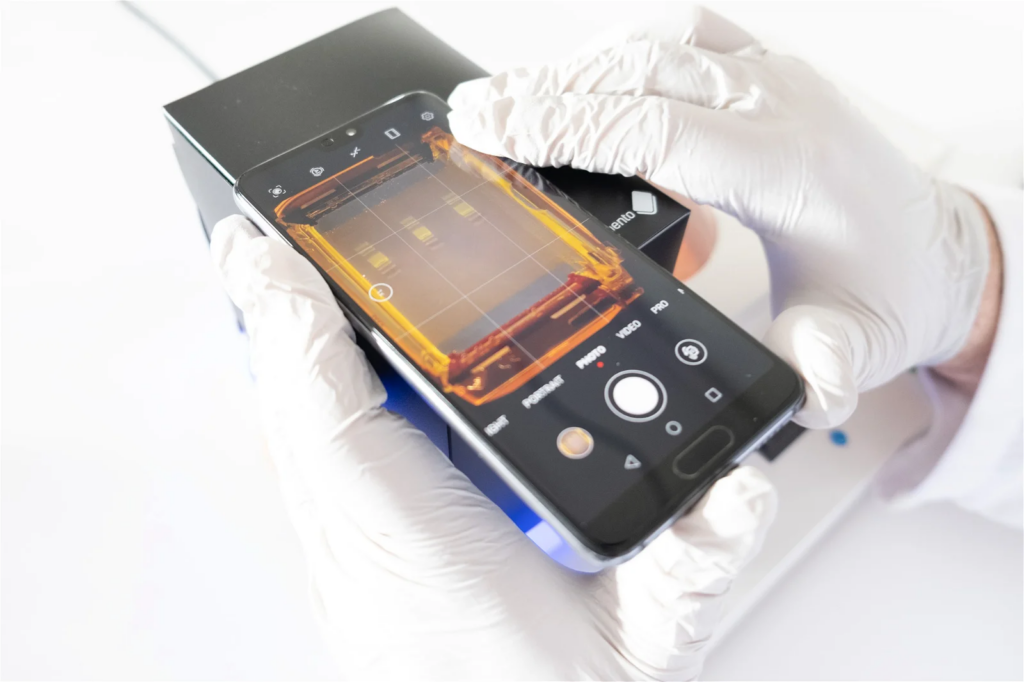
For best visualisation you can use a smartphone camera to take an image of the gel using the Gel Imaging Hood (included with Bento Lab)
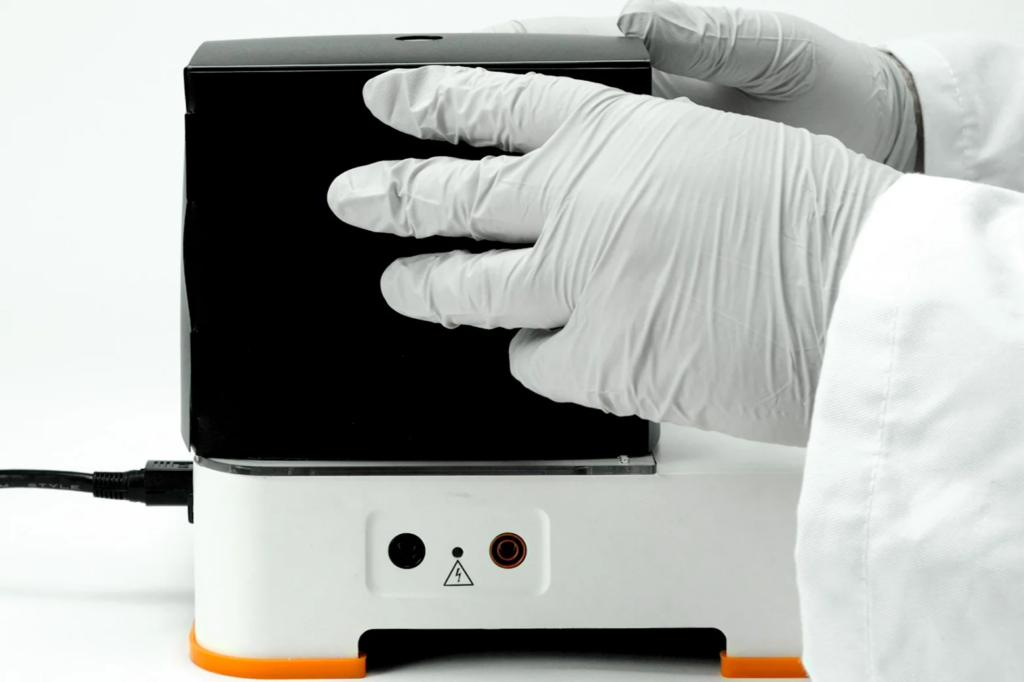
To do this, place the gel tray open on the blue transilluminator (being careful not to spill any of the running buffer), and place the assembled Gel Imaging Hood over the gel tray.
For ideal visibility, imaging should be done away from direct light. The darker it is, the better the contrast will be.
If your Bento Lab transilluminator is in direct light, you can block out some of the incoming light with one hand against the Gel Imaging Hood to get better contrast.
On the Bento Lab interface, you can turn the transilluminator light on by selecting the light bulb icon (1) and clicking the orange wheel button.
You can also increase and decrease the intensity of the light by selecting the light bulb icon, holding down the orange wheel button with two fingers, and rotating it left or right.

By placing your smartphone camera lens over the orange filter at the top of the Gel Imaging Hood and activating your phone camera, you will be able to see the bands of DNA fluoresce in the gel. You can then take a digital photograph to document your gel results.

If you have a smartphone with a “Pro” camera mode, you could try manually adjusting the focus so that it focuses exactly on the bands of interest to get a better image.
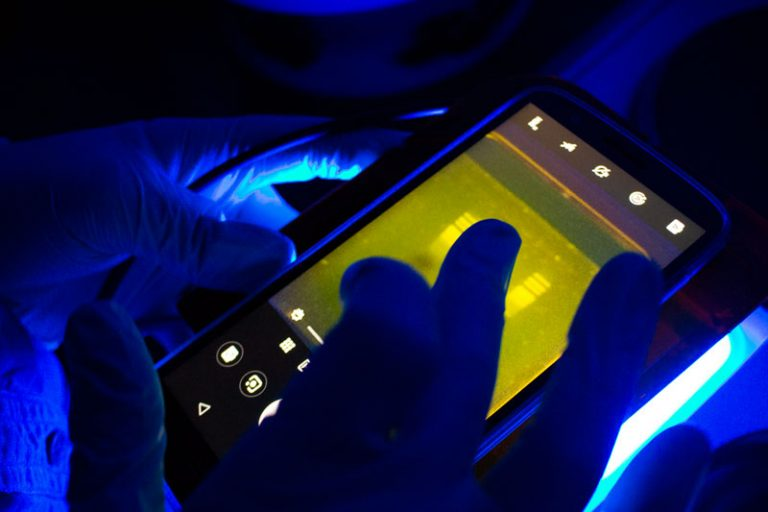
Another way of visualising the agarose electrophoresis gel is to use the orange lid of the electrophoresis tank as a filter for visualisation. This method is best suited for use in a dark room, or for a quick visual check while the gel is running.
To do this, first remove the lid and wipe away any condensation (if it is present), and then replace the lid. Through the orange lid, you will be able to see the bands of DNA fluoresce at their positions in the gel.
To photograph the gel using the orange lid, remove the lid, wipe away any condensation, and hold it over your phone’s camera lens to take a picture and document your experiment’s results. However, the contrast will be inferior to images using the Gel Imaging Hood unless the room is very dark.

Analysing your results
Your gel should show the DNA ladder and a single clear band in your sample(s). This means your sample is ready to send for sequencing.
Troubleshooting:
If you have successfully visualised your DNA ladder and have no bands in your sample of the expected size, then either your DNA extractions have not been successful or your PCR has not been successful. If you have used a positive control then this will allow you to determine which of these processes failed.
You can read more about troubleshooting using PCR controls here, and more about non-specific amplification here.
After you have taken good photos of the gel for your documentation, you can dispose of the gel in your general waste bin.
Disposal of agarose gels is a standard waste disposal procedure followed by research labs. If you have questions, get in touch with us.